AE MAS release notes and install guide - 6.1f (Australia)
Release date—12 July 2023
This page outlines the Management Accounting System (MAS) Version 6.1f, which provides MAS integration to AE Tax 2023.
Prerequisites
Before you install MAS, you need to carry out some checks with the software.
If you have modified any of the Master Files categories specific to your practice, you are advised to export your Master Files.
The Master Files, including the Master Chart, are exported for both backup and restoration purposes. Installing MAS either:
Installs the standard Master Files, or
Upgrades your existing Master Files.
To upgrade, deselect the MAS Master Chart of Accounts option on the Which products do you wish to install? window during the installation. For security, you need a current backup of the file called DS6MF100, (normally located in \S6Client), or you need to export your master files.
Perform the following to back up your master files:
The existing Master Files, including the Master Chart, will be upgraded if the Master Chart of Accounts is not selected during the installation. This step is not necessary if you already have a current copy of the DS6MF100 file located in the directory where your Master Files are located (for example, S6Client).
Open your MAS4 ledger.
Select Utilities and click Export Master Files. The Export Master Files window opens.

Select the items you want to export and click OK. The File Export window opens.
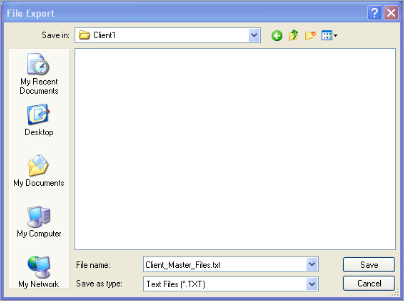
Choose the file name and location to which the Master Files will be exported, and click Save.
Installation
Ensure that you have the correct prerequisite releases and available free space for the installation.
Do not install an older version of the software over a more recent version. This may cause data corruption and flag some files as unreadable.
Double‐click the MYOBAEMAS6_1f_AU_FullInstaller.exe file to open the Welcome window.
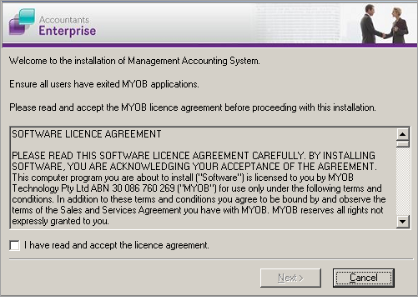
Click Yes to accept the terms of the agreement and activate the Next button.
Click Next to open the Location of the MYOB System files window.
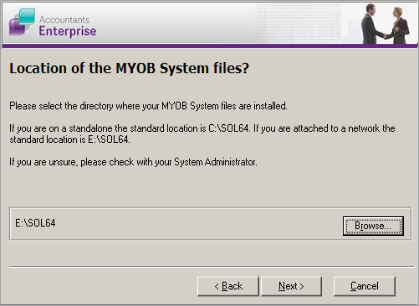
This window prompts you to select the directory where the System Files are. This is usually \SOL64.
To change the default directory, click Browse, navigate to the correct directory and click OK.
Click Next to open the Management Accounting System window.
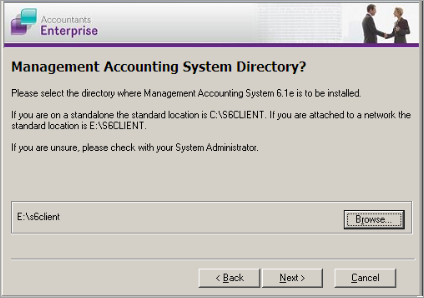
If necessary, click Browse, navigate to the correct directory and click OK.
Click Next to open the Which products to you wish to install window.
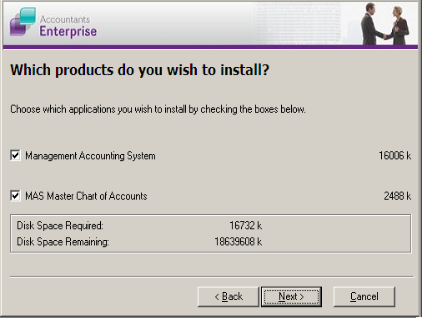
Both options may be selected for installation:
Management Accounting System
Master Chart of Accounts
Installing the Master Chart overwrites any existing Master Chart. Do not install the Master Chart if it is already installed.
Click Next to check the components currently installed. Two backup warning messages may display:
The back up DS6MP900 message is a reminder if Management Accounting System is installed
The back up DS6MF100 message is a reminder if Master Chart of Accounts is installed.
The Ready to Install window opens.
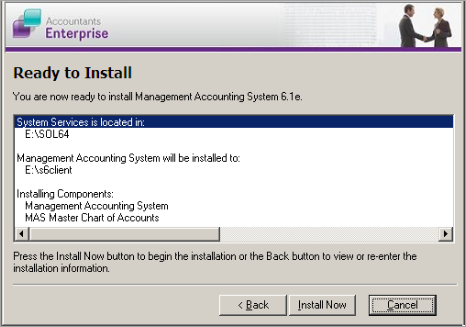
Check that the details are correct and, if required, click Back to change any of the
details previously selected before returning to this window.
Click Install Now to start the installation.
Wait until the Installation Completed window opens.
Click OK to finish.
If you have any problems with the installation, contact us.
Post-installatoin
You will need to restore your Master Files if your practice uses a personalised Master Chart and the standard Master Files were re‐installed during the installation.
To restore Master Files from backup:
Access any MAS ledger.
Select Utilities and click Import Master Files.
A message displayed informing you that the process will import Master data files, and asking you if you want to overwrite existing codes.

If you click Yes, the all previously exported codes will be imported. The import
will overwrite existing codes.
If you click No, only previously exported codes that do not already exist in the Master Files will be imported. The import will not overwrite codes.Click Yes or No. The File Import window opens.
Choose the file name and the location from which the Master Files are to be imorted, and click Open.
If you disabled your antivirus or User Accounts Control (UAC) before installation, enable your antivirus and UAC.