MYOB AE 2019.0—Prerequisites
Read this section completely before installing MYOB Accountants Enterprise. It will help you plan for the tasks required and ensure a successful installation of the MYOB Accountants Enterprise Suite.
Specific requirements are listed below for each product that is included in the combined installer.
If you use MYOB Accountants Enterprise with Tax and you've migrated to a new server:
- Locate and open the Taxinstall.ini file—it is either in your SOL64 directory or your MYOBAE\AESQL\TAX directory.
- Make sure SBRSenderServer specifies your new server name. If you have multiple servers, this is where your SBRSenderService windows service resides.
- Check that your computer meets the system requirements.
If you'll be lodging tax returns via PLS using Cloud software authentication (CloudAuth), or if you’re intending to use any MYOB online products, ensure that you have MYOB Logins configured for your practice. See Logging in to MYOB AE/AO for more detail about MYOB Logins.
This is not relevant if you’re one of the minority of practices that are still using AE Tax without the benefits of the fully integrated AE Suite including Homepages. Contact your MYOB Client Manager to find out how to take advantage of all the benefits of upgrading to the current MYOB AE platform.
Make sure that you know the login name and password for your server, SQL server and each workstation.
You must login as a system administrator to the servers, the SQL server instance used by MYOB AE and all workstations. Don't use the default administrator login created by Windows.
Exit all MYOB software and all Windows programs on your server:
make sure all staff members have exited all MYOB applications on their workstations, including closing any icons in their system tray.
tell your staff members that MYOB applications will not be available for use during the installation process.
Ensure your regional settings and format language are set to Australia. See Regional Settings for more information on how to change your regional settings and format language.
Ensure that you have internet access.
To make sure that your database is upgraded correctly you MUST reboot the server machine that you intend to use to perform the MYOB AE installation on before you start the actual installation.
Allow sufficient time for installation. It may take more than an hour to complete.
- Disable any anti-virus / malware software and user account control on your server.
Check your disk space and back up your data:
The combined installer requires a minimum 4GB of free disk space on the local disk of your server. Make sure to enable them again once you’ve finished installing MYOB AE.
As the combined installer takes some database backups, ensure that you also allow extra disk space for the back up of your database(s).
Back up all your existing MYOB AE databases, for example, AE database, Tax database and/or Corporate Compliance database.
The combined installer locally backs up only your AE and Tax databases prior to the actual installation of MYOB AE. We recommend that you do your own database backups prior to installing this release.
We may replace any MYOB Master Reports at any time.
We recommend that if you’ve customised our masters to export a backup copy of the report layouts using the Report Export Utility which is available from Reports > Report > Export & Import before upgrading MYOB AE.
Take note of the following information prior to installing Corporate Compliance for the first time or using the combined installer for the first time:
The location of the electronic lodgment files.
This is the location of the files sent to and received from ASIC when electronically lodging.
This location must be available to all users who electronically lodge ASIC forms within Corporate Compliance.
The location of your backup files.
The location of the Corporate Compliance database backups must be on the SQL server where Corporate Compliance is installed.
We recommend that you set up a network share on the Corporate Compliance server that is available to all Corporate Compliance users.
Take note of the following information prior to installing Document Manager for the first time or using the combined installer for the first time:
Required servers
You’ll need to identify the servers in your practice. The servers may be on one machine or located separately.
Servers:
The Practice ManagerApplicationServer is where Practice Manager is installed. Document Manager installs new software components in the DEPLOY directory on that server.
The File StoreServer is where Document Manager stores documents such as Microsoft Word and Excel, email and PDF documents. This secure directory may only be accessed by the administrator and must have ample storage.
If your File Store server is on the same machine as the application server the configuration process commences automatically. If not, you will need to log onto the File Store server, browse to the shared directory on the application server and run the DM_Config.exe file.The SQL Server is where the Practice Manager database is located.
We recommend that the SQL Server is on the same machine as the File Store server.
Location of Document Manager
By default, Document Manager is installed in the MYOB AE Deploy directory, for example, C:\Program Files\MYOB\Central\Deploy or C:\MYOBAE\AESQL\Central\Deploy
Details of your document file store
Identify which MYOB AE database will be associated with the File Store.
By default, the Document Manager File Store Service is installed in C:\Program Files\MYOB\Knowledge Management\DMFSService\
The File Store location is a local folder, not a network folder, e.g., C:\MYOB\Data\DMFS_VPMSER or DMFS_AEDB1.
The default Port Number used for the DMFS Service is 4001.
Details of your indexing service
By default, the Document Manager Indexing Service is installed in C:\Program Files\MYOB\Knowledge Management\DMIndexingService\
The default Port Number used for the Indexing Service is 4002.
Other things to consider
If you’re performing a network installation, ensure that the selected location is accessible from each workstation on your network.
The Document Manager installation will set default values for the interrelated components it uses. We recommend you use the defaults as far as possible but recognises the need for these values to be customised. If you have a system administrator they'll be able to advise you on changes that need to be made.
The following table is provided to assist you to record changes to default values, as these values will be required during future software upgrades.
Component | Recommended/Standard | Your choice |
|---|---|---|
Document Manager Server components | ||
Document Manager Server location | C:\MYOB\Knowledge Management\Document Manager\Server or C:\MYOBAE\AESQL\Knowledge Management\Document Manager\Server |
|
Network Share Name | MYOBDM |
|
Deploy Directory (also required for the server configuration) | C:\Program Files\MYOB\Central\Deploy or C:\MYOBAE\AESQL\Central\Deploy | (this must be a local drive) |
MYOB Intranet is installed to | C:\MYOB\Knowledge Management\Intranet\Server or C:\MYOBAE\AESQL\Knowledge Management\Intranet\Server | MYOB Intranet is a standard part of the Document Manager install so these settings are established automatically for you. |
Intranet Network Share name | MYOBIntranet | MYOB Intranet is a standard part of the Document Manager install so these settings are established automatically for you. |
Intranet Data directory | C:\MYOB\Knowledge Management\Intranet\Data | MYOB Intranet is a standard part of the Document Manager install so these settings are established automatically for you. |
Intranet Data store | MYOBIntranetData | MYOB Intranet is a standard part of the Document Manager install so these settings are established automatically for you. |
Multiple SQL databases?: (server configuration also treats one database at a time) | - | Yes | No |
VPMSER |
| |
Authentication method SQL user name: SQL Password: | Windows - - | SQL | Windows |
Backup your Accountants Framework database? | Yes C:\MYOB\SQLBackup\’machinename’\VPMSER or AEDB1.bak | Yes | No |
Document Manager File Store (DMFS) | ||
Is the (application) server the File Store Server? | Yes | Yes | No |
Configuration tool | C:\MYOB\Knowledge Management\Document Manager\Server\Utility\DM_Config.exe or C:\MYOBAE\AESQL\Knowledge Management\Document Manager\Server\Utility\DM_Config.exe |
|
File Store location | C:\MYOB\Data\DMFS |
|
DMFS Service Directory | C:\Program Files\MYOB \Knowledge Management\ DMFSService | We recommend that you don’t change these settings. |
DMFS Port number | 4001 | We recommend that you don’t change these settings. |
Index Service Details | C:\Program Files\MYOB \Knowledge Management\ DMIndexingService | We recommend that you don’t change these settings. |
Indexing Port number | 4002 | We recommend that you don’t change these settings. |
Optimise | Yes | We recommend that you don’t change these settings. |
Workstation components | ||
Workstation executable | C:\MYOBAE\AESQL\WorkstationInstall\setup.exe |
|
DM workstation components installed to this location | C:\Program files\MYOBAE\AESQL\ Knowledge Management\ Document Manager\WorkstationInstall\setup.exe |
|
It is important that before you install AE Tax 2019.0 you prepare your data so that the best possible result is achieved during the year-end and rollover of your client’s information from 2018 to 2019.
The year-end routine runs automatically as part of the installation.
The returns that are not to be rolled forward to 2019, such as returns for clients for whom you no longer act, need to be flagged in AE Tax 2018. These returns will remain intact in 2018 and any other prior years.
This step is important for accurate statistical reporting done by the practice, such as the Lodgment Monitoring program and 85% on-time lodgment requirements.
It is important to note that you don't have to Exclude from Rollover returns that:
have not been completed and lodged in 2018 or
were marked Final on the front cover of the return.
The Exclude from Rollover checkbox is found on Return Properties > PAYG/Lodge under the Current Year section.
Setting the Exclude from Rollover checkbox on this tab excludes this return from rollover.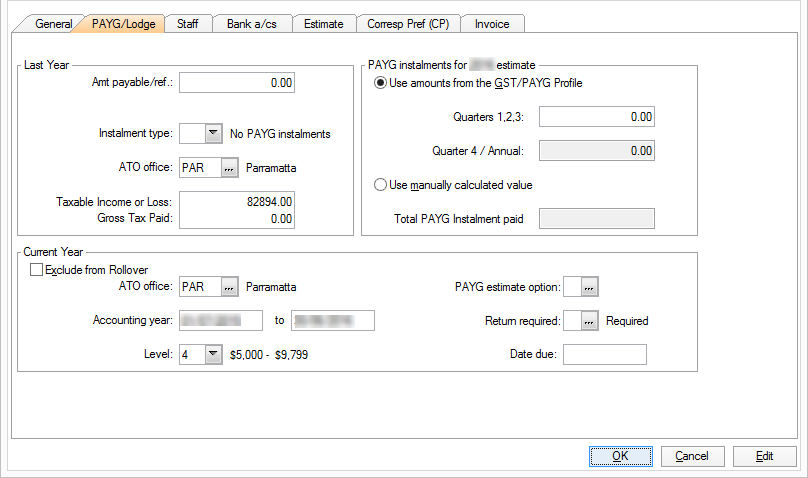
To exclude a batch of returns from rollover use the Bulk Return edit routine.
The Bulk Return edit procedure is:
Select Maintenance > Bulk Return edit.
At the Return area to change field:
Click the ellipsis button.
Highlight the Exclude from rollover flag entry.
Click Select
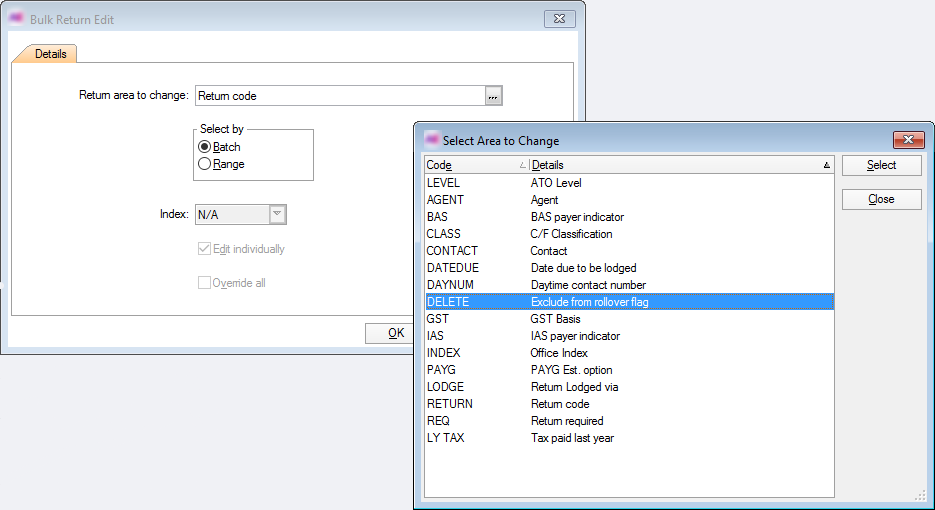
Deselect Edit individually.
Select Override all so as to apply the change to each selected return.
Click OK to close the warning message dialogue.
Click OK at the Bulk Return Edit main window. The Select Returns for Update index listing all returns on the system opens.
Highlight and select each return to be included in the batch.
If you sort the list of returns by Return Code, type the code and press Enter to move to that return. Alternatively, if you sort the list by TFN, key the TFN, with or without spaces, and press Enter. Then click Select.
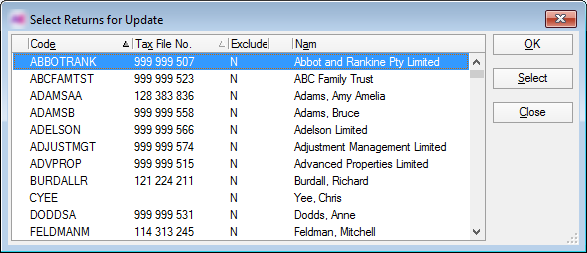
Each return that has a green tick is included in the batch.
Click OK. The Edit Rollover flag window opens.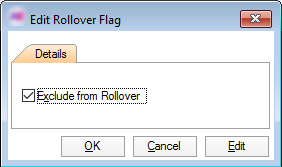
Select the Exclude from Rollover checkbox and click OK. The program will tick the checkbox in the Return Properties > Lodgment tab for each of the returns in the batch.
Processing prior year returns
After rolling 2018 into 2019, any new client return added to 2018 will not be in 2019.
If you create a client return in 2018, you must also create one in 2019. Then, when you open the 2019 return, the RSD (rollover) opens and details from the 2018 year will roll into 2019.
Likewise, if you create a new return for say 2017, you will also have to create it in 2018 and then open it to roll it into 2018, then repeat the process to roll it into 2019.
The Integrity check routine checks the validity of front cover and schedule information and ensures that each Index that links information in one part of the system to its counterparts is not corrupt.
To perform the integrity check:
Select System Services > Tax 2018 > Utilities > Integrity Check.
Enter the Master Password.
The Integrity Check window opens.The default master password in AE Tax is ASSERT.
- Select the Index check and Validate alternate indices checkboxes.
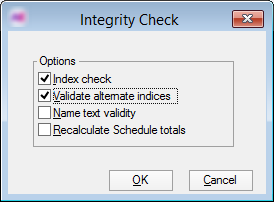
- Click OK to open the Print window.
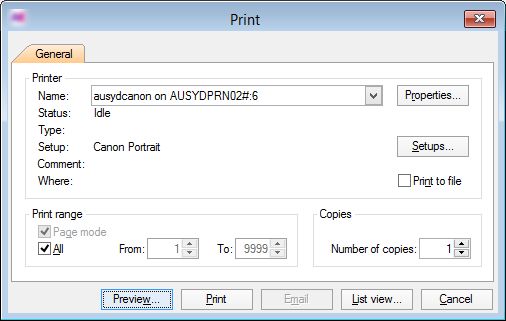
Select Preview. The Integrity Check – Indexes window opens.
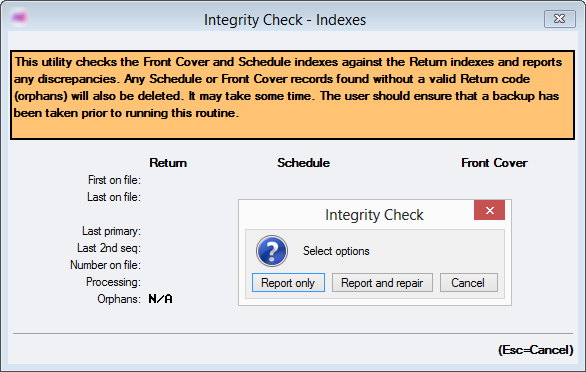
Select Report and repair.
The report will scroll to the screen. We recommend that you print or save this report as it may contain instructions regarding some returns and it will highlight any repairs that were made during the process.
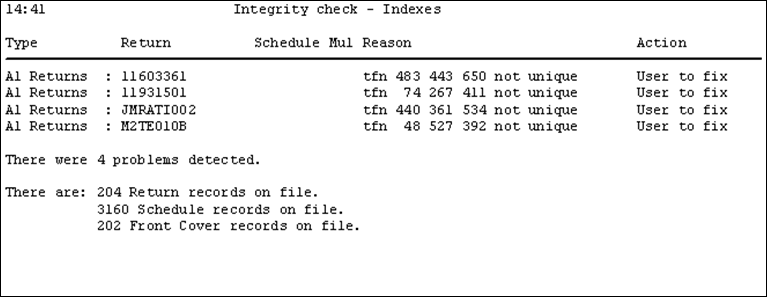
In the above report, the Reason ‘orphaned’ may occur where a schedule is not linked to a return.
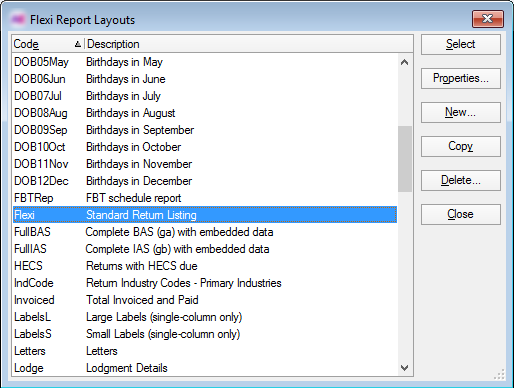
Click Reports > Flexi Report. The Flexi Report Layouts index opens.
If you have previously created your own flexi report layout for this report, select it. If not, select the AE Tax default report Flexi from the index.
Do not click OK until you have made your selections for sorting, layout, range, selection and filters.- Click Properties. The Flexi Report window opens.
- Click the Sorting tab.
At the Index field, select the sort sequence:- Primary: to list all returns in a continuous report
- Secondary: to sort the report by partner, manager, employee or agent as recorded on the Return Properties > Staff tab of each return.
- Click the Selection tab
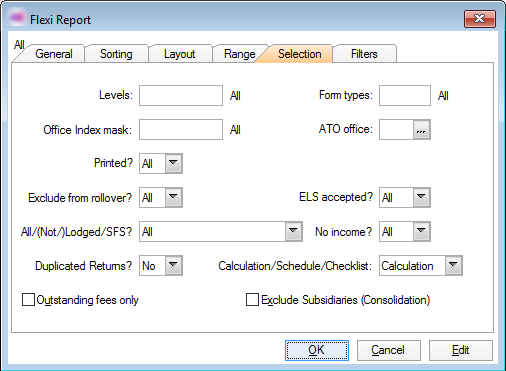
- Select Yes at Exclude from rollover?
Click OK.
Click Preview. The sequence Record Selection window opens.
Select the Sort Sequence for the report. The primary sequence is by return code, the secondary sequence is by a staff code, and the tertiary sequence offers other miscellaneous sort sequences for the layout of the report.
- Click OK to accept the range default of first to last.