This section is only relevant if you are installing MYOB AE for the first time.
If you're already using MYOB AE, follow the instructions for MYOB AE 5.4.35—Upgrading your existing version.
Follow these 3 steps when installing MYOB AE for the first time and then check the MYOB AE 5.4.35—Post-installation.
1. Server installation
Download the MYOB AE 5.4.35.161 - Full Install file from my.MYOB.
Follow the instructions below depending on whether you have a terminal server or a server with client workstations.
Terminal server installation
The following instructions are for a single terminal server that contains your Accountants Enterprise data and programs. Programs are accessed after starting a session on the terminal server or via a Citrix system.
On the terminal server console:
-
Open Control Panel > Classic View.
-
Click Install Application on Terminal Server.
-
Click Add New Programs. The Run Installation Program wizard opens.

-
Click Browse and locate setup.exe.
-
Click Open.
-
Click Next. The InstallShield wizard opens and starts extracting the files required for installation.

-
If you see a question asking you to install Microsoft.Net Framework 3.5 or 4.6, Click Yes to install it.
When installation is complete (it takes several minutes), the machine may reboot.
If the machine reboots, restart the installation from Step 1 above. -
The Welcome window may or may not open, depending on whether you had to install .NET 3.5 and/or 4.6. If it does not open, go to Step 9.

Click Next on the Welcome window, if it opens on your desktop. The Licence Agreement window opens.

-
Read the agreement and select I accept the terms in the license agreement.
-
Click Next. The Destination Folder window opens.

-
We recommend that you accept the default destination shown.
If you're installing on a 64-bit server, the program path will be C:\Program Files (x86)\MYOB\Central\
-
Click Next. The Setup Type window opens.

-
Select Complete (or Custom) and click Next.
If you've selected Complete, this installs all workstation components on this server. Continue at Step 18 below.
If you've selected Custom, the Custom Setup window opens, displaying the options available for installation. All will be installed by default unless you select otherwise.
-
Click one of the drop-down lists to display the features available.
There are different features available, depending on the option selected.
The Client Installation drop-down is shown below as an example:

Click Help to open a help window about the options available.
Click OK to close the window.
Click Space to open a window that displays the amount of space available on your system after your options are installed.
Click OK to close the window. -
Select the appropriate feature (for example, This feature, and all subfeatures, will be installed on local hard drive) and click Next.
-
Repeat from for each feature.
-
Click Next. The Destination Folder – Client Installation window opens.
This is your network share path for the client workstation install.

-
Click Next to accept the default location.
-
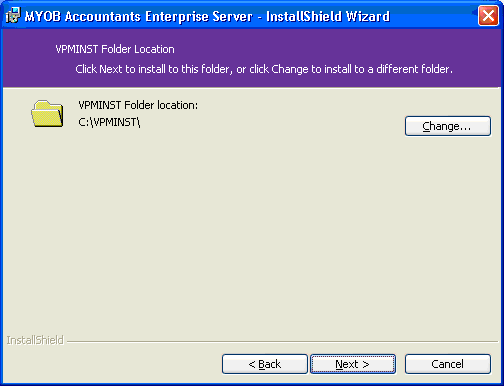
Click Install to start the installation wizard. The VPMINST Folder Location window opens.
-
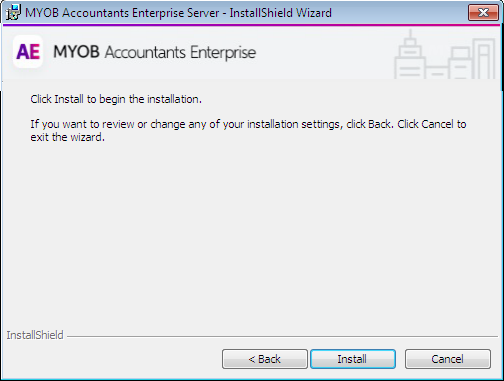
Click Next. The Ready to Install the Program window opens.
-
Click Install to start the installation wizard.
-
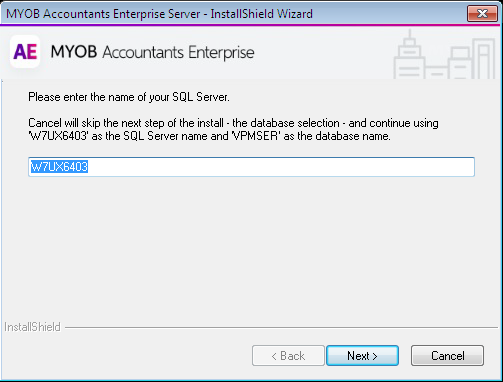
When complete, the SQL Server window opens (displaying the SQL server name).
-
Enter the name of your SQL server.
-
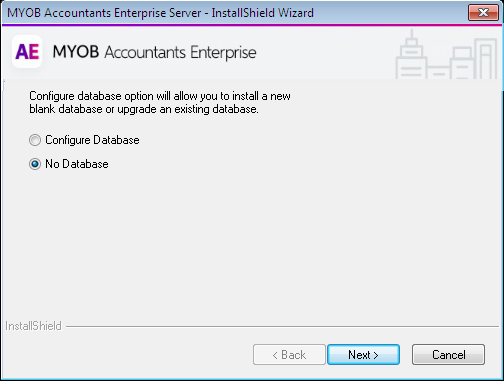
Click Next. The Database Option window opens.
-
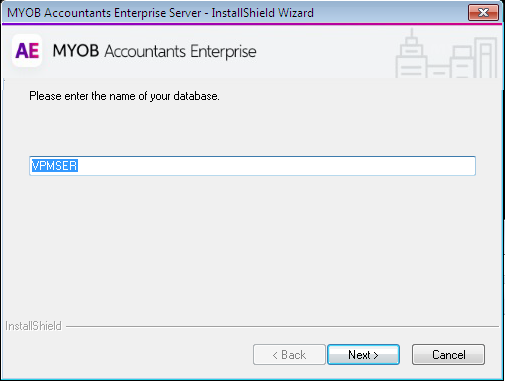
Select No Database and click Next. The Enter Database Name Details window opens.
-
Enter the name of your database and click Next. When the installation finishes, the Registration window opens.
The registration window will only open if you are upgrading from a version prior to 5.0. If upgrading from version 5.0, click Finish.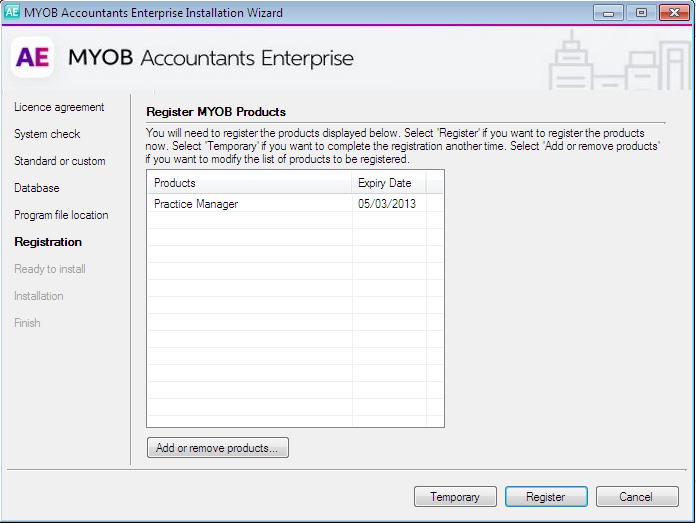
You'll see a list of your registered products in the window. Practice Manager should be on the list.
If you click Temporary, you can run AE Practice Manager as a single user until you contact MYOB Support to get your new registration code.
-
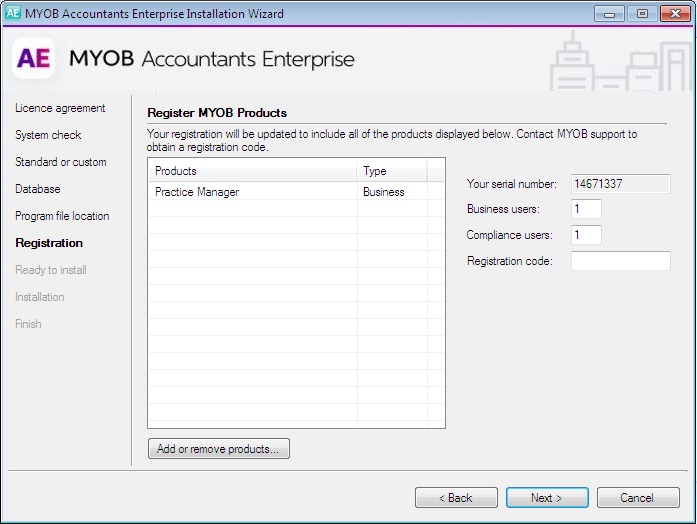
Click Register to register Practice Manager. The window shows your registration details.
-
Contact MYOB Support to obtain your new registration code. You'll need to tell them them:
-
the number displayed in Your serial number
-
the products displayed in the list.
-
-
Enter the Registration code. A confirmation window opens.

-
Click Close. The InstallShield Wizard Completed window opens.
This server installation also copies the .NET 3.5/4.6 installer file, ready to be used on any workstation that doesn't have it installed.
If prompted, we recommend that you restart the computer.
-
Click Finish.
Server with client workstations
The following instructions are for a server that has client workstations containing Accountants Enterprise data and programs.
-
Double-click the downloaded install file to start installing.
-
Click Next or Before you install and read the information displayed in the window.
-
Click Next or Installation.
-
Click Click here to install Accountants Enterprise.
-
If you see a question asking you to install Microsoft.Net Framework 3.5 or 4.6, Click Yes to install it.
When installation is complete (it takes several minutes), the machine may reboot.
If the machine reboots, restart the installation from Step 3 above Click here to install Accountants Enterprise. -
The Welcome window below may open.
-
Click Next on the Welcome window, if it opens on your desktop. The Licence Agreement window opens.
-
Read the agreement and select I accept the terms in the license agreement.
-
Click Next. The Destination Folder window opens.
-
We recommend that you accept the default destination shown.
If you're installing on a 64-bit server, the program path will be C:\Program Files (x86)\MYOB\Central\
-
Click Next. The Setup Type window opens.
-
Select Complete (or Custom) and click Next.
If you've selected Complete, this installs all workstation components on this server. Continue at Step 13 below.
If you've selected Custom, the Custom Setup window opens, displaying the options available for installation. All will be installed by default unless you select otherwise.
-
Click one of the drop-down lists to display the features available.
There are different features available, depending on the option selected.
The Client Installation drop-down is shown below as an example:
Click Help to open a help window about the options available.
Click OK to close the window.
Click Space to open a window that displays the amount of space available on your system after your options are installed.
Click OK to close the window. -
Select the appropriate feature (for example, This feature, and all subfeatures, will be installed on local hard drive) and click Next.
-
Repeat for each feature.
-
Click Next. The Destination Folder – Client Installation window opens.
This is your network share path for the client workstation install.
-
-
Click Next to accept the default location.
-
Click Install to start the installation wizard. The VPMINST Folder Location window opens.
-
Click Next. The Ready to Install the Program window opens.
-
Click Install to start the installation wizard.
-
When complete, the SQL Server window opens (displaying the SQL server name).
-
Enter the name of your SQL server.
-
Click Next. The Database Option window opens.
-
Select No Database and click Next. The Enter Database Name Details window opens.
-
Enter the name of your database and click Next. When the installation finishes, the Registration window opens.
The registration window will only open if you are upgrading from a version prior to 5.0. If upgrading from version 5.0, click Finish.
You'll see a list of your registered products in the window. Practice Manager should be on the list.
If you click Temporary, you can run AE Practice Manager as a single user until you contact MYOB Support to get your new registration code.
-
Click Register to register Practice Manager. The window shows your registration details.
-
Contact MYOB Support to obtain your new registration code. You'll need to tell them them:
-
the number displayed in Your serial number
-
the products displayed in the list.
-
-
Enter the Registration code. A confirmation window opens.
-
Click Close. The InstallShield Wizard Completed window opens.
This server installation also copies the .NET 3.5/4.6 installer file, ready to be used on any workstation that doesn't have it installed.
If prompted, we recommend that you restart the computer.
-
Click Finish.
2. Client (workstation) installation
A workstation (client) install must be run on each machine before using the new version of MYOB Accountants Enterprise version, otherwise you'll not be able to open Accountants Enterprise on those machines.
Different setup steps are necessary depending on the type of server configuration your organisation uses.
Terminal server setup
-
Log on to the Terminal Server console.
-
Open Control Panel > Classic View.
-
Click Install Application on Terminal Server.
-
Click Add New Programs.
-
Browse to the following location: \\servername\CentralClient. You can either:
-
open Windows Explorer and enter the path into the Address field or
-
select Start > Run and enter the path into the Open field and click OK.
-
-
Locate and run setup.exe in this directory.
-
If you see a question asking you to install Microsoft.Net Framework 3.5 or 4.6, Click Yes to install it.
When installation is complete (it takes several minutes), the machine may reboot.
If the machine reboots, restart the installation from Step 2 above. -
The Welcome window below may open.

-
Click Next. The Setup Type window opens.

-
Select Complete (or Custom) and click Next.
If you've selected Complete, this will install all workstation components. Proceed to Step 11.
If you've selected Custom, the Custom Setup window opens, displaying the options available for installation. The available options are Save with Contacts Add In or Outlook Add In. All will install by default unless you select otherwise.

-
Do you use the Save with Contacts Add In?
If Yes, go to Step 10b.
If No, click the


If you use MYOB Document Manager, select No for Save with Contacts Add In.
-
Do you use the Outlook Add In?
If Yes, go to Step 10c.
If No, click the
-
Click Next. The Ready to Install the Program window opens.

-
-
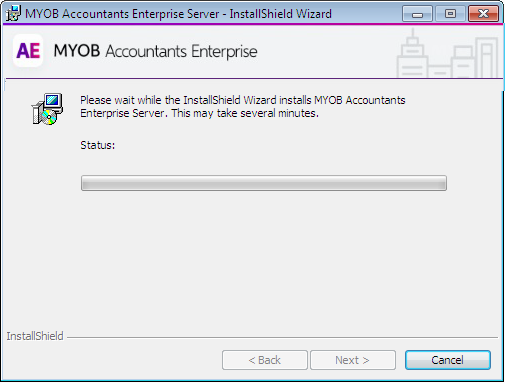
Click Install. The Installing Accountants Enterprise Client window opens.

-
Wait while the installation window shows the status of the installation. The InstallShield Wizard Completed window opens.

-
Click Finish.
-
Reboot the Terminal Server.
You must reboot the Terminal Server BEFORE you access the software.
Workstation setup
-
Log on to a workstation as a user with administrator privileges or the domain administrator.
-
Browse to the following location: \\servername\CentralClient. You can:
-
open Windows Explorer and enter the path into the Address field or
-
select Start > Run and enter the path into the Open field and click OK.
-
-
Locate and run setup.exe in this directory.
-
If you see a question asking you to install Microsoft.Net Framework 3.5 or 4.6, Click Yes to install it.
When installation is complete (it takes several minutes), the machine may reboot.
If the machine reboots, restart the installation from Step 2 above. -
The Welcome window below may open.
-
Click Next. The Setup Type window opens.
-
Select Complete (or Custom) and click Next.
If you've selected Complete, this will install all workstation components. Proceed to Step 8.
If you've selected Custom, the Custom Setup window opens, displaying the options available for installation. The available options are Save with Contacts Add In or Outlook Add In. All will install by default unless you select otherwise.
-
Do you use the Save with Contacts Add In?
If Yes, go to Step 7b.
If No, click theIf you use MYOB Document Manager, select No for Save with Contacts Add In.
-
Do you use the Outlook Add In?
If Yes, go to Step 7c.
If No, click the -
Click Next. The Ready to Install the Program window opens.
-
-
Click Install. The Installing MYOB Accountants Enterprise Client window opens.
-
Wait while the installation window shows the status of the installation. The InstallShield Wizard Completed window opens.
-
Click Finish.
-
Reboot the workstation.
The workstation must be rebooted BEFORE you access MYOB AE.
-
Repeat this procedure for all other workstations, as required.