This support note applies to:
-
AO Document Manager (AU)
-
AO Classic Document Manager (AU)
-
AO Classic Document Manager (NZ)
-
AO Document Manager (NZ)
-
AE Document Manager (NZ)
-
AE Document Manager (AU)
Article ID: 31547
In MYOB Document Manager, you don't have any mandatory year-end tasks to complete.
There are maintenance tasks for you to complete. The main one is to add a new year. This will allow you to profile documents to the new accounting (financial) year.
To prepare for a new financial year, you can:
Add a new year to the extra list
-
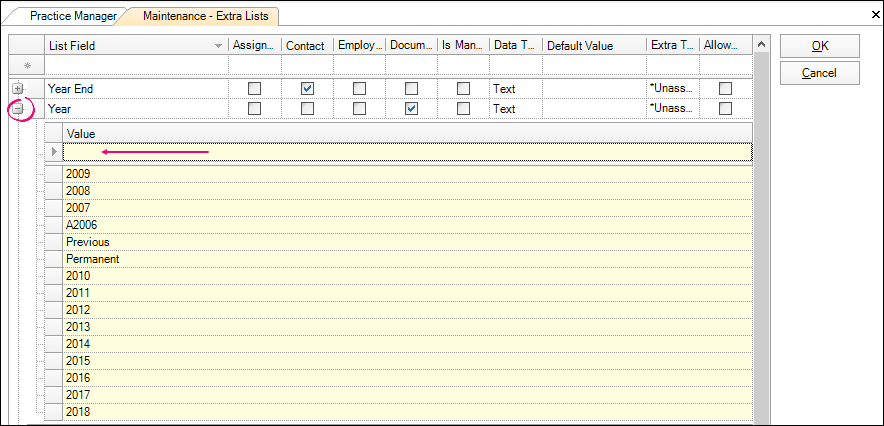
In AE/AO, go to Maintenance > Maintenance Map > User Defined > Extra Lists. The Maintenance - Extra Lists tab opens.
-
Click + to the left of Year. You'll see a list of existing values
-
Enter a new value into the Value field, for example, 2019, and press Tab on your keyboard.
-
Click OK.
. 
Add a new category
-
n AE/AO, you can either:
-
In the toolbar, click the Documents drop-down and choose Intranet. The Intranet window opens. Login and from the menu, select Administration or
-
From the menu bar, go to Maintenance > Maintenance Map > Documents > Intranet Administration.
-
-
Highlight the Intranet heading at the top of the left-hand pane to add a new top level category or select an existing category to create a sub-category.
-
Select File > New Category or right-click the Intranet heading or an existing category and select New Category. The New Category window opens.
-
In Title, enter a new category title (maximum of 30 characters). This is the description that users will see in the MYOB Intranet left-hand menu Categories.
-
Under Roles, select the checkboxes of the roles you want to be able to view and use this category.
-
Click OK. The new category is saved and added to the MYOB Intranet Administration left-hand pane.
Add a new filing cabinet
-
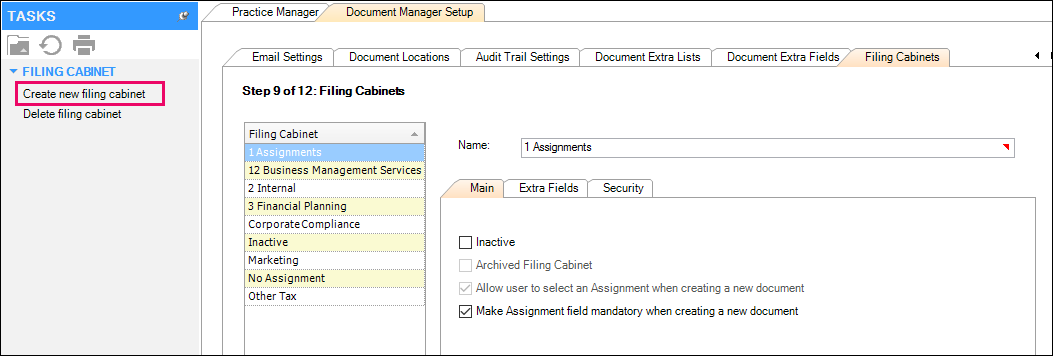
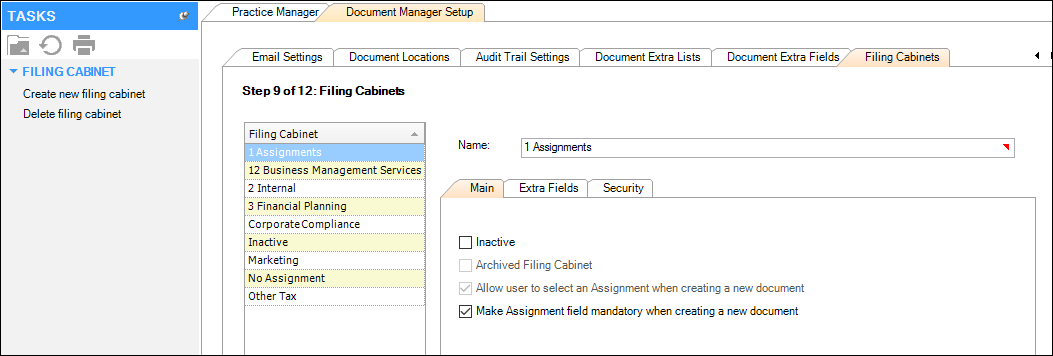
In AE/AO, go to Maintenance > Maintenance Map > Documents > Document Manager Setup. The Document Manager Setup tab displays.
-
To view the filing cabinet list, you can either:
-
under the Welcome tab, click Filing Cabinets or
-
scroll through the tabs to the right and click the Filing Cabinets tab
-
-
On the Tasks bar, select Create new filing cabinet. Step 1 of the Create Filing Cabinet Wizard opens.
-
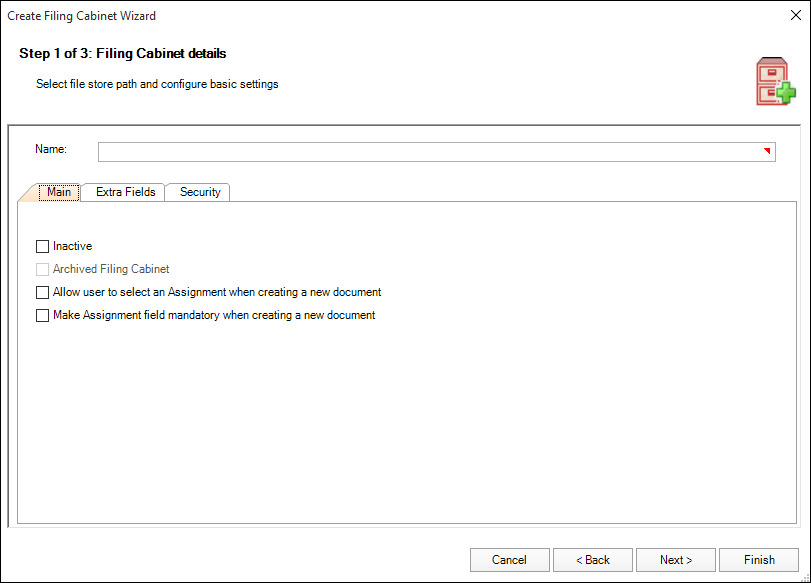
In the Name field, type the required filing cabinet name. Select the relevant options for your practice in the Main tab and click Next. Step 2 of the Create Filing Cabinet Wizard opens.
-
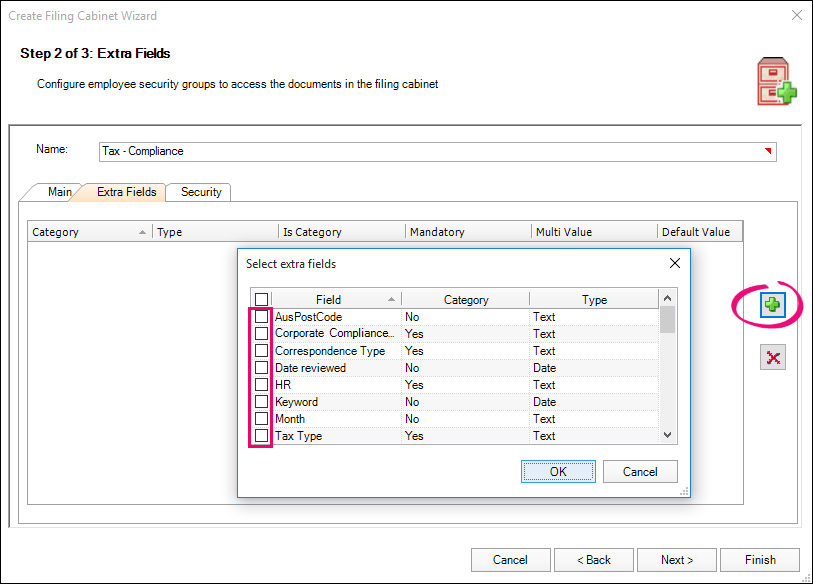
On the right-hand side of the window, click the green + icon. The Select extra fields window opens.
-
Select the required Extra fields and click OK. Step 2 of the Create Filing Cabinet Wizard displays again.
-
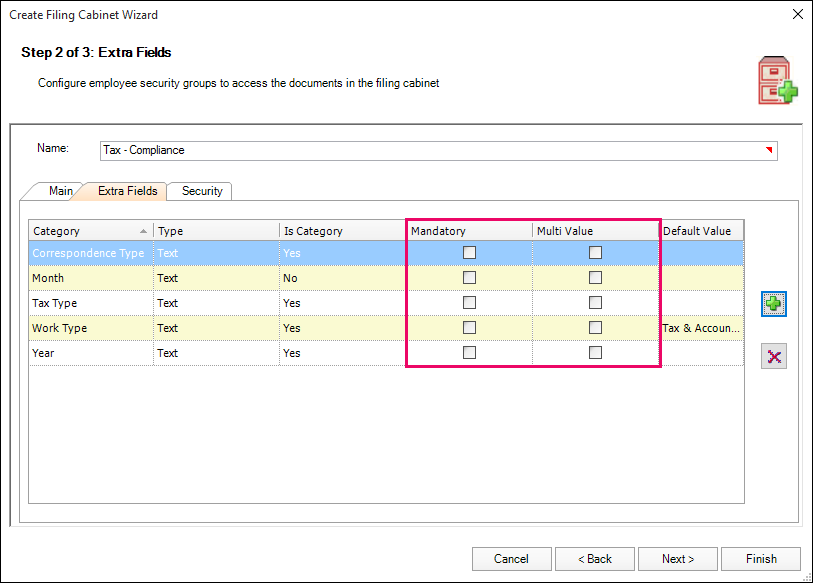
Select Mandatory and Multi value options for each extra field if relevant and click Next. Step 3 of the Create Filing Cabinet Wizard opens.
-
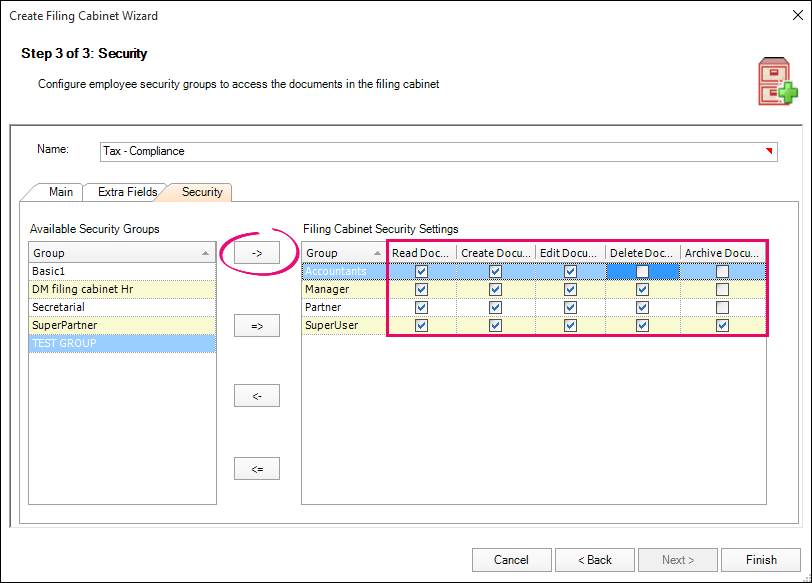
Under Available Security Groups, highlight the correct security group.
-
Click -> to assign this security group to Filing Cabinet Security Settings. The selected group displays in Filing Cabinet Security Settings.
-
Repeat Steps 8-9 until all of the required security groups appear under Filing Cabinet Security Settings.
-
Tick the relevant security permissions for each security group and click Finish. The Filing Cabinet tab appears and the new item is displayed in the Filing Cabinet list.
-
Click Finish. You have created a new filing cabinet to classify your documents.
Change the default values for the profiling screen
-
From the main menu, go to Maintenance > Maintenance Map > Documents > Document Manager Setup. The Document Manager Setup tab opens.
-
To view the filing cabinet list either:
-
under the Welcome tab, click Filing Cabinets or
-
scroll through the tabs to the right and click the Filing Cabinets tab.
-
-
Highlight the required Filing Cabinet. The Main, Extra Fields and Security tabs for that Filing Cabinet display.
-
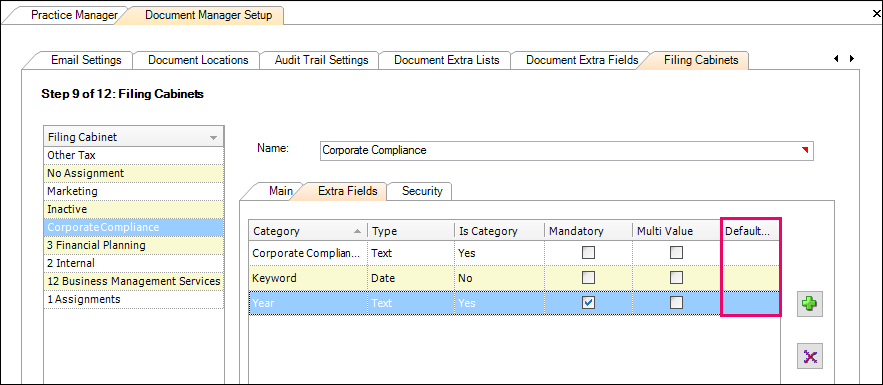
Click the Extra Fields tab. The Categories for the selected Filing Cabinet display.
-
In the Default Value column on the relevant row, click the ellipsis (...).
-
From the Select values window, select the required value.
-
Click OK to save.
-
Click Finish to close the Document Manager Setup tab.
You have now set default values for the categories within the selected filing cabinet. Those values will be used when saving documents to Document Manager.