Customising your report styles
You can customise the report styles with your branding, your practice logo and colours.
You can then use these report styles to the exported financial statements to have a consistent and professional look across all reports in your practice.
Only administrators can configure these styles
In Client Accounting, we’ve provided a pre-configured bundle that you can select as default report style.
Watch the video to learn how to customise the reports
Customise report styles
From the start screen, select Styles.
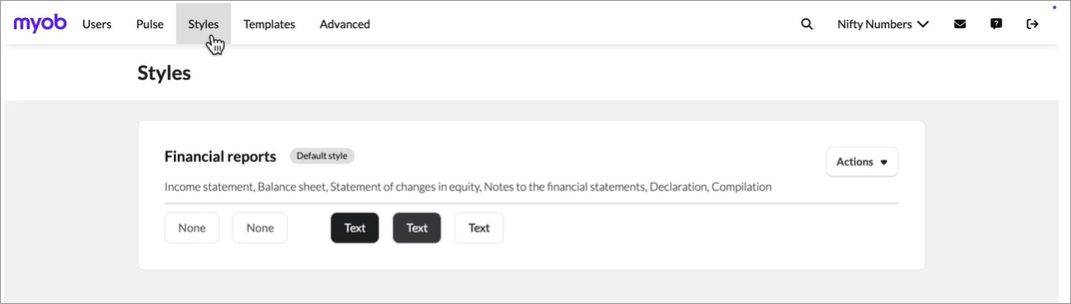
You’ll see the Financial reports which is the default style provided by us.
From the actions menu, select Edit Style.
In the Financial Reports page, you’ll see
cover page,
table of contents,
income statement,
balance sheet, notes,
Director's Declaration
compilation report.
You can show or hide the pages or reorder the reports by dragging and dropping.
Use the + symbol to drag and drop the pages.

To customise the report style, go to the Style settings on the top of the window.
Here you can add a:
cover page, title page, or last page in PDF format.
header or footer image in JPG, PNG, or JPEG.
Click Save changes and Save.
This style will now be available when you export the Financial statement
Adding a logo
To include your logo on financial statements, add it to the cover page, leaving space for the report title and client name.
To upload a cover page as per the previous steps in the Style settings window.
This is an example of the cover page.
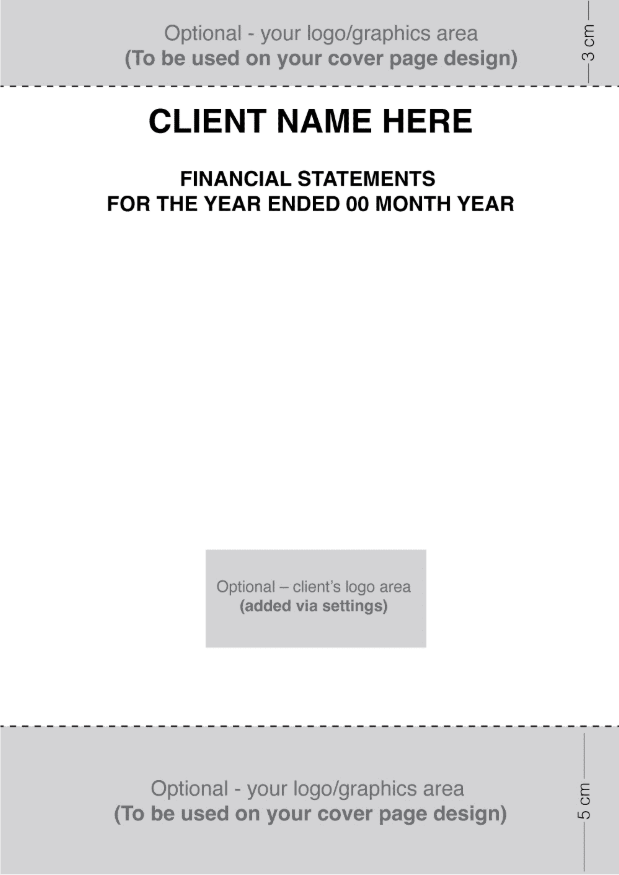
Place your logo or other graphic elements in the grey areas.
We recommend keeping the white space clear to avoid overlapping, as it will display the client name, report title, and report date upon export. We've indicated where these details will appear.
If you choose to add your client's logo in the client settings, we've marked its default designated placement in grey. However, this can be adjusted in the Report Style Settings.