Financial statements
Create financial reports using customised style for your practice
For each client, you can control the reports to be included, and the order in which they are displayed in the financial statements.

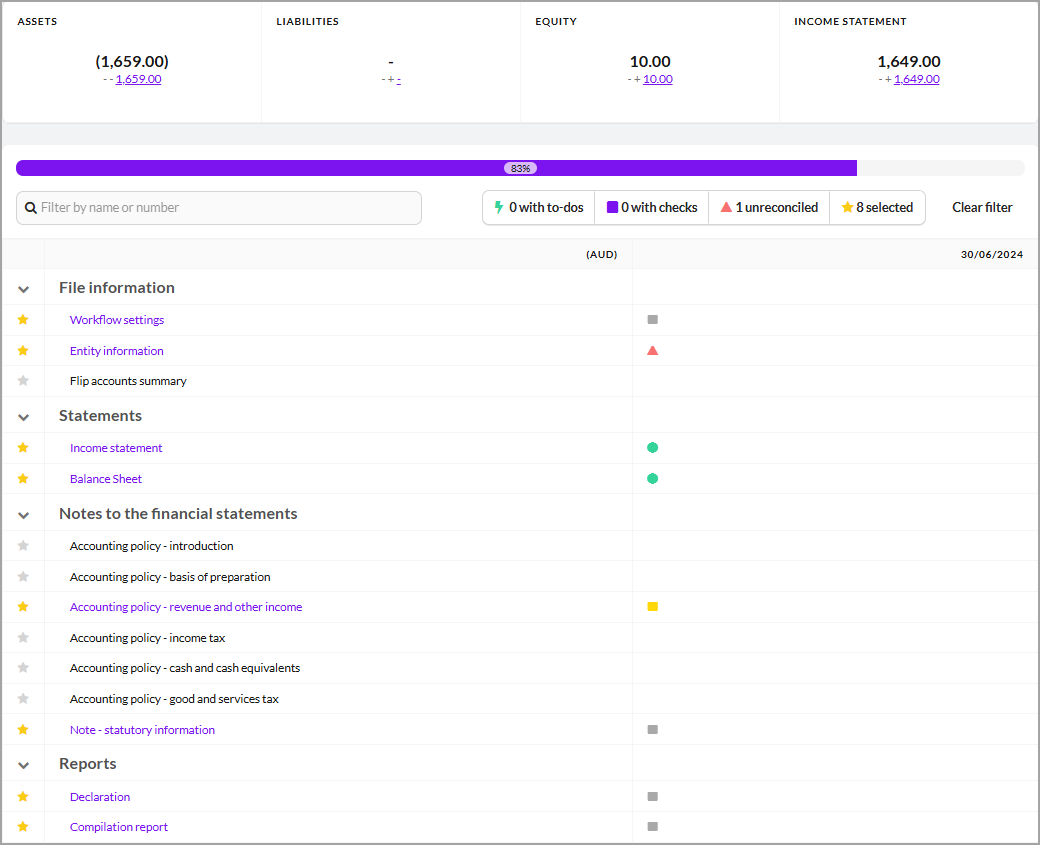
Progress Bar at the top of your workflow page displays how many tasks you’ve completed. It shows a percentage and summarises tasks, checks, reconciliations, and accounts that still need work. Your goal is to reach 100% on the progress bar, which means all tasks in the workflow are done.
Templates are represented by icons

Red triangle: indicates pending tasks for a template
Yellow square:
Green circle: All tasks completed, no action required.
Active templates have a yellow star and purple text.
The yellow star indicates that the template will be included with the Financial statements when exported so it requires reconciliation as part of the workflow.
If an account has a star, a red triangle or green dot will appear next to it. If a template isn't needed for a specific file, you can unstar it.
Editing note paragraphs
Each note has different customisation options. It's not possible to edit a preconfigured paragraph in a note however there will be different customisation options available.
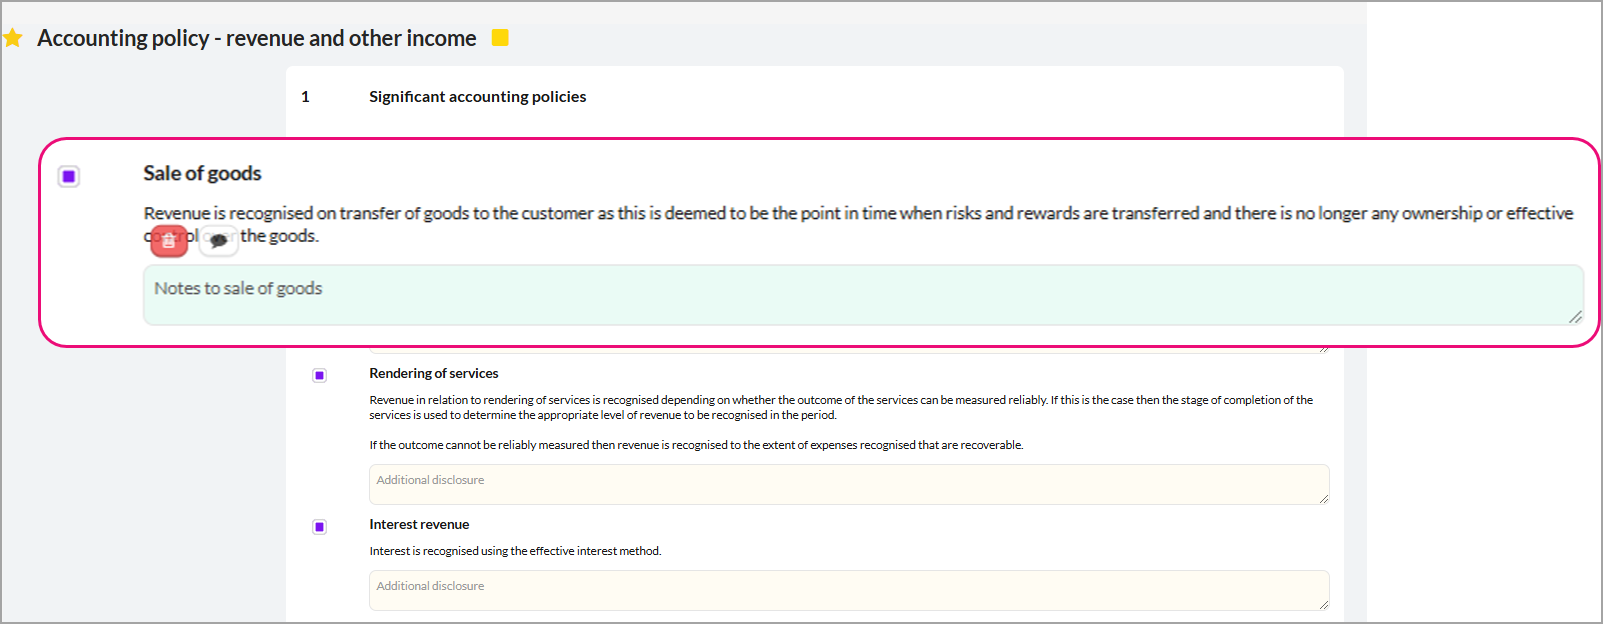
Click to open the template to add, remove or edit paragraphs

De-select the purple square to exclude the paragraph from the note.
Type any additional notes in the yellow field, and make sure to press enter to save your work.
Use the red trash can icon to delete the notes.
Next steps
Exporting Financial reports and workpapers
