Practice Manager only
Instead of creating invoices individually for each client, the Bulk Invoicing Wizard enables you to create a batch of invoices based on clients and their WIP data.
You can use this process to bill out specific disbursement transactions that have been imported into your database or wip for a Partner up to a specific date for example.
During this process, you can:
-
Filter clients by: Partner, Manager, Department, Office or Extra fields/data.
-
Filter the WIP data by: date, amounts, employees and task codes.
You also select your invoice template and your standard paragraph text which enables the quick production of your bills.
Your practice/system administrator can restrict access to Bulk Invoicing to specific security groups by setting a security task permission.
Select Maintenance > Maintenance Map > Security > Task Permissions. Deselect the [Bills][Bulk Invoicing] task permission in the Other group for the Practice Manager product to restrict access to Bulk invoicing.
Using Bulk Invoicing
To create a batch of invoices, follow these steps:
Step 1—Select the clients to be invoiced
-
In the toolbar, click the Billing dropdown and choose Bulk Invoicing.
-
Fill in the fields below if applicable:

Label
Field
Description
A
Company
(AE only) - Select the required Company if applicable. (AO) - No selection required; the company field automatically prefills.
B
Partner
Select the required Partner from the drop-down. If a partner is selected, then only clients assigned to that partner will be selected for invoicing
C
Manager
Select the required Manager from the drop-down. If a manager is selected, then only clients assigned to that manager will be selected for invoicing.
D
Department
Select the appropriate Department from the drop-down. If a department is selected, then only clients assigned to that department will be selected for invoicing.
E
Office
Select the required Office from the drop-down. If an office is selected, then only clients assigned to that office will be selected for invoicing.
F
Assignment Template/ Job Type
(AE) - Select the required Assignment Template from the drop-down. If an assignment template is selected, then only WIP entered against that assignment template will be included in the invoices.
(AO) - Select the required Job Type from the drop-down. If a job type is selected, then only WIP entered against that job type will be included in the invoices.
G
Extra Field
You can further filter clients that will be selected for bulk invoicing by using the Extra Field table.
-
-
Select first cell of the table.
-
Select the appropriate Extra Field Name from the drop-down.
-
In the corresponding Extra Field Value field, select the required value.
-
If the extra field is a data entry field, then enter a value.
-
If the extra field is a date, select the appropriate date from the drop-down calendar.
-
If the extra field is a flag, select the appropriate Yes/No response from the drop-down.
-
If the extra field is a list, select the appropriate value from the drop-down.
Only clients whose Extra Field Value matches the entered selection are included in the invoicing list.
-
-
-
Click Next.
Step 2—Select WIP to be invoiced
You can select which WIP is to be invoiced based on:
-
date
-
WIP amounts
-
the employee who entered the WIP
-
task code
-
Fill in the relevant fields below:

Label
Field
Description
A
Include WIP entered up to the date
The default date is the Today’s date. Select the date from the drop-down calendar to enter a prior date. WIP entered after the selected date will not be included in the invoices.
B
Select clients with WIP amount - more than
Type a $ amount if applicable. Clients with outstanding WIP more than the amount entered will be selected for invoicing.
C
Select clients with WIP amount - less than
Type a $ amount if applicable. Clients with outstanding WIP less than the amount entered will be selected for invoicing.
D
Select WIP entered by employee
Select an employee from the drop-down if applicable. The drop-down lists all the current employees. If an employee is selected, then only WIP entered by the employee is included in the invoices.
E
Select WIP entered for task code
Select a task code from the drop-down if applicable. If this option is used, then only WIP for the selected task code is included on the invoices.
F
To task code
Click the checkbox to select a task code from the adjacent drop-down to select an end task code range where you have selected a task in field E.
-
Click Next.
Step 3—Select the invoice style, paragraphs and text
-
Fill in the fields below:

Label
Field
Description
A
Billing Company
(AE) If you only have one Billing Company, the company is chosen by default. If you have multiple billing companies, click the drop down and select the relevant Billing Company.
(AO) Your Billing Company is automatically selected.
B
Invoice Style
Select the Invoice Style from the drop-down.
C
Tax Type
Select the Tax Type from the drop down if applicable.
D
Invoice Date
Select the Invoice Date from the drop-down. The default date is today’s date.
E
Add
Click Add to add your paragraph text. The Master Paragraphs window opens.
-
Click

Alternatively, click the Table view checkbox to view the list of Paragraph Names and Paragraph Text. You can use the Search field to locate your text.
-
Select the required Paragraph by clicking the paragraph.
To highlight multiple paragraphs, hold the Ctrl key and click the required paragraphs.
-
Click Insert. The selected paragraphs will be displayed in the table.
F
Edit paragraph text
You can edit any paragraph text you have added by clicking the paragraph number and then making your changes in this section.
G
Delete
You can delete a paragraph by highlighting the paragraph and clicking Delete.
H
Move Up / Move Down
You can reposition the order of your paragraphs by highlighting a paragraph and clicking Move up or Move down.
-
-
Click Next.
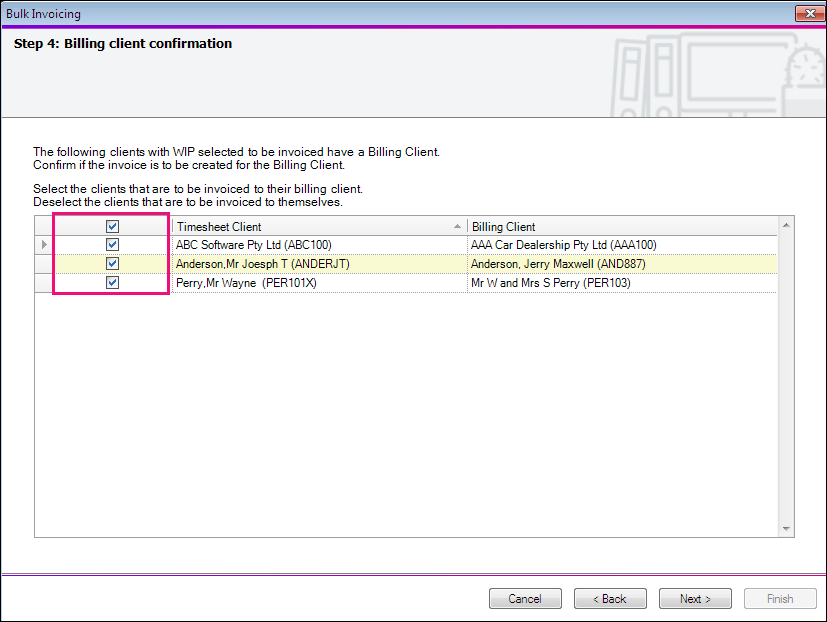
Step 4—Billing client confirmation
This windows displays all the clients to be invoiced that have a Billing/Parent client linked to them.
If none of the selected clients have a Billing/Parent Client, then Step 4 of the Bulk Invoicing Wizard will not be displayed.
-
Review the listed Billing/Parent Clients.
-
Deselect any checkbox in the Use Billing Client? column of the clients that will be invoiced to themselves rather than to their Billing/Parent Client.
-
Click Next.
Step 5—Confirm clients to be invoiced
-
Review the listed clients and deselect the checkbox for any client you don't want to invoice at this stage.
All clients listed are selected by default.

Your data isn't saved until you have entered all the information and clicked Finish.
Click Cancel to close the wizard if you don't wish to proceed.
Click Back to go back to a previous step and change your input.
-
Click Finish.
-
The Invoices created window opens which lists the number of draft invoices that have been created.
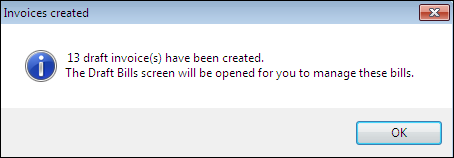
-
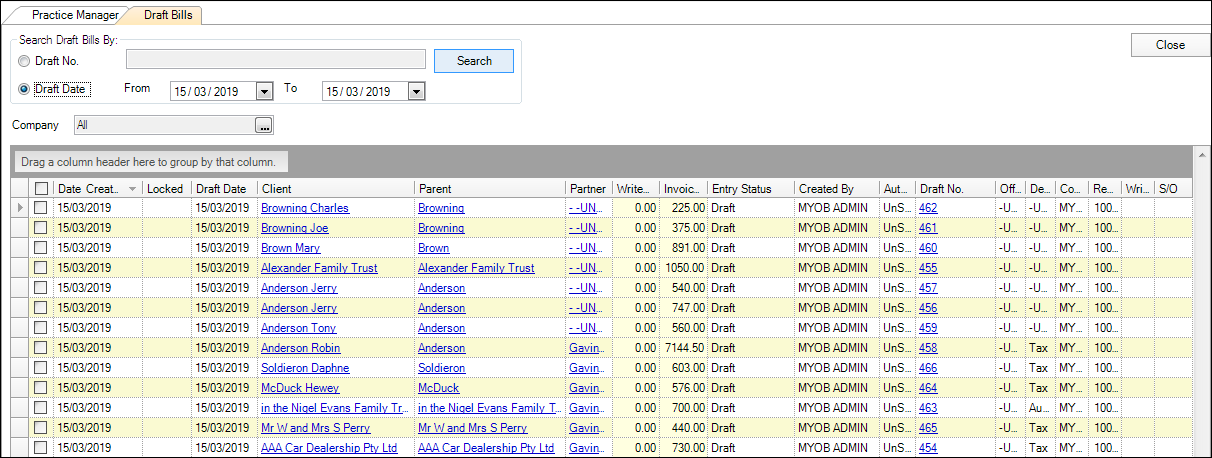
Click OK. The Draft Bills page opens so that you can manage these bills. You can submit (AE), approve (AE) and post in bulk via this page.