Release date—27 June 2023 (Australia)
Want to save a print-friendly version of this page?
To see all the content on this page at once, click the print page ( 
Pre-requisites
Installing on standalone PC
-
Log in as an administrator.
-
Browse to the location where you saved the download.
-
Double-click the downloaded file.
-
Click OK.
-
Click Unzip to extract the installation files to a temporary directory.
You may specify a location using Browse before clicking Unzip.
-
Click Finish. The setup window displays.
-
The Installation menu will open automatically. Otherwise, to open the Installation menu, browse to the extracted installation files and double-click the readme.exe.
-
Click Yes to accept the terms of the Licence Agreement.
-
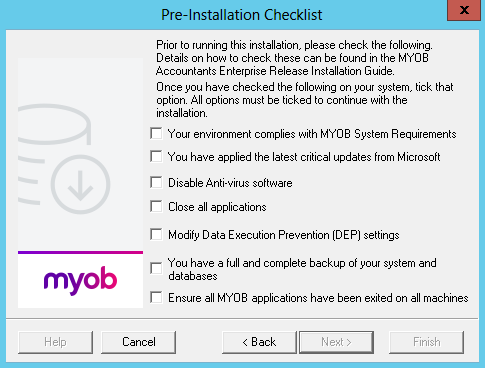
The Pre-Installation Checklist window displays. You must tick each condition to confirm you have checked them all.
-
Click Next. The Choose Target Directory window appears.
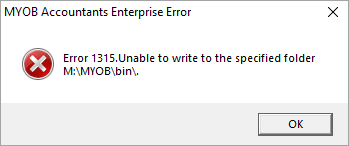
We recommend that you don’t change the default directory. If you change it to a mapped drive, you may get the following error during the install.

If you decide to change the directly, ensure you don’t enter any spaces in the path.
-
Click Next and the Enter Business Name window opens. Confirm your business name on this screen.
-
Click Next. On the Software Components window confirm your settings.
-
Click Next. The following warning message displays:
You must be at the server where the AE Tax SQL database is located. -
Click OK. On the Start Copying Files window confirm the summary of the current settings.
-
Click Next and the setup progress displays.
-
When the setup files are successfully upgraded, your computer may need to be restarted. The Setup Complete window automatically appears.
-
Click Finish.
If you’re using a proxy server you don’t need to change the ClientFrameWork.exe.config file in the server Deploy folder see Proxy Server Information.
-
Continue with Integrated Release install guide—6.51/8.35 (Australia) | IntegratedReleaseinstallguide—6.51/8.35(Australia) upgradedb steps
Installing on a server/terminal server
For a terminal server, run the installation using Add or Remove Programs on the terminal server console.
For a server, run the installation from the server console
-
Log in as an administrator.
-
Browse to the location where you saved the download.
-
Double-click the downloaded executable file.
-
Click OK on the dialogue box.
-
Click Unzip to extract the installation files to a temporary directory.
You may specify a location using Browse before clicking Unzip.
-
The Installation menu will open automatically. Otherwise, to open the Installation menu, browse to the extracted installation files and double-click the readme.exe.
-
If you are installing AE Tax:
-
To a terminal server: go to the next step.
-
Otherwise, on the Installation page, click the install button and go to Step 10.
-
-
Click Browse.
-
Open the Control Panel:
For a Windows 2012 terminal server:
-
Click Install Application on Remote Desktop Server Wizard. The Install Program wizard opens.
-
Click Next and the Run Installation Program window opens.
-
Browse to the Setup.exe file, then click Open.
-
-
Click Yes to accept the terms of the Licence Agreement. The Pre–Installation Checklist window displays. You must tick each condition to confirm you have checked them all.
-
Click Next. The Choose Target Directory window appears.
We recommend that you don’t change the default directory. If you change it to a mapped drive, you may get the following error during the install:
If you decide to change them, ensure you don’t enter any spaces in the path.
-
Click Next and the Enter Business Name window opens. Confirm your business name on this screen.
-
Click Next. On the Software Components window confirm your settings.
-
Click Next. The following warning message displays:
You must be at the server where the AE Tax SQL database is located. -
Click OK. On the Start Copying Files window confirm the summary of the current settings.
-
Click Next and the setup progress displays.
-
When the setup files are successfully upgraded, your computer may need to be restarted. The Setup Complete window automatically appears.
-
Click Finish.
-
Continue with Integrated Release install guide—6.51/8.35 (Australia) | IntegratedReleaseinstallguide—6.51/8.35(Australia) upgradedb steps
Post-installation
Using Tax 2023
After the installation of MYOB Accountants Enterprise and database upgrade, your data is ready for adding 2023 tax returns.
You can either add 2023 tax returns:
-
on a client by client basis, or
-
perform the practice roll forward to the 2023 tax year.
Roll forward
You can roll forward all 2022 tax returns to 2023.
-
To rollover all your practice's tax returns, see All Clients Tax Data below.
-
To roll forward each tax return when you open the return in the tax ledger, see One Client Tax Data below.
Lodgment due dates updated from the Client List report will be cleared for returns that are rolled after the report is run. We recommend that you rollover all returns.
All clients tax data
To run the Retain Schedule Data process from Contacts or Client Compliance:
-
Click Tools > Roll Forward > Tax Rollover > Roll.
-
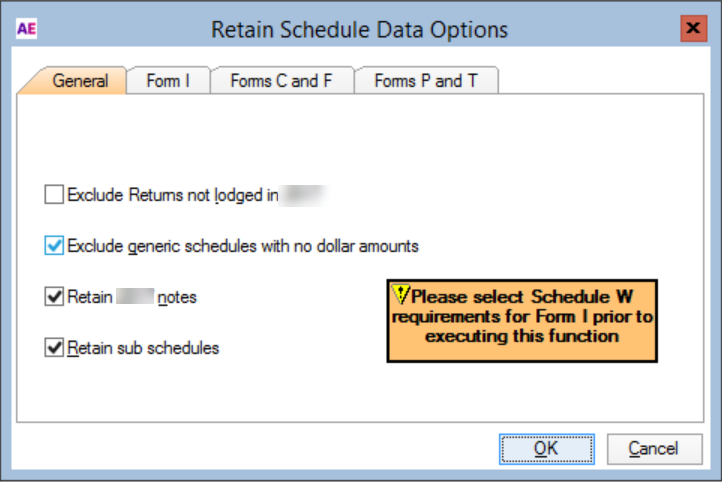
In the Retain Schedule Data Options window select the required options on each tab, and click OK to start the roll forward process.
-
If you're using series 6 or series 8, a document for 2023 AE Tax Forms is added to the Documents tab of the matter(s) that contained the 2019 AE tax forms document.
-
If you're using Practice Manager, a document for 2023 AE Tax Forms is added to the Work Files tab.
-
For any client where the 2023 AE Tax Forms were not created, for example, if you have selected to exclude returns not yet lodged in 2022, then once the 2022 return for that client has been completed, you can roll forward to 2023 as described below in One client tax data.
-
A single client's tax return
To roll a single client’s tax return from 2022 to 2023, use the Add New Tax form wizard.
-
From the:
-
Matters window for the client, select the Documents tab and click Add.
-
PM Client Compliance window, select the Work Files tab and click Add.
-
Contacts, click File > Open Document, select the required Matter and click Add Document. The Compose Document dialog opens.
-
-
Select to add document of type Tax Form and click OK. The New Tax Form wizard appears.
-
Select 2023, and step through the wizard.
-
Click Finish and the Roll Forward dialog is displayed.
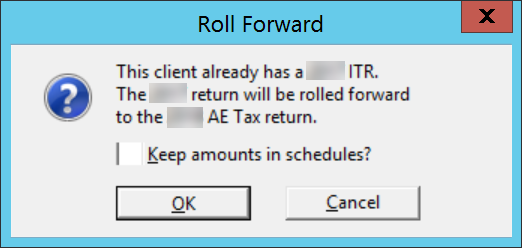
We don't recommend using Keep amounts in schedules? as it will roll the same amounts that were entered in the existing return into the rolled over return.
Whether this option is selected or not, errors may result if rolled returns are not reviewed thoroughly prior to lodgment.
If there wasn't an existing tax return for the client, we'll create and open a current blank AE tax return.
-
Click OK to create the client's 2023 AE Tax return. The 2023 AE Tax Forms document is added and opened.