These instructions explain how to install MYOB AO for the first time.
If you already have MYOB AO installed, use the instructions for MYOB AO 2019.0—Upgrading your existing AO (Australia).
The MYOB AO installation wizard will guide you through the installation process.
Main installation
You must run the installation on the computer that will store your MYOB AO database. If you have a network this is usually your server. See What is my system setup? for more information on your system setup.
-
Download the 5.4.32.108 Full installer file from my.MYOB.
-
Exit all programs and reboot the computer you are going to install MYOB AO on to ensure a clean environment.
-
Log on to the computer as the administrator.
-
If the installation applies to both Australia and New Zealand, you will see the Regional Selection screen. Select the region that applies to you so the correct software for your region is installed and click Next. The Welcome - Licence Agreement window opens.
At the bottom of the installer window there is a link to the release notes.
-
Read the Licence Agreement carefully, select I have read and accept the licence agreement then click Next.
-
Click Install Now to start the installation.
The installation may take more than an hour to complete. Make sure that you have allocated enough time for the installation.
-
If you are running the MYOB AO Full Install, you may see this window:

If you click Yes, Microsoft SQL Server 2014 Service Pack will be installed, if you click No the install will end. -
If the SQL installation fails, you’ll need to manually install the SQL server service, see Installing SQL Server 2014 Service Pack 2 manually below:

-
A dialog appears indicating that you may receive an Open File - Security Warning message when opening MYOB AO. Click OK.
-
When the MYOB AO installation is complete, click Finish.
If you’re using a proxy server you don’t need to change the ClientFrameWork.exe.config file in the server Deploy folder see Proxy Server Information.
-
If you are prompted to restart your computer, make sure the Restart now box is ticked before clicking Finish.
Restarting each computer after completing the installation will help to avoid any issues using your MYOB software. See What is Enable Linked Connections and Open File - Security Warning for more information.
-
If you disabled your anti-virus / malware programs before you installed MYOB AO, re-enable it before continuing.
-
If you have a network setup and you are running MYOB AO on more than one computer, perform a Workstation installation to update the local deploy folder.
Instructions on how to log into MYOB AO are launched in a browser window or see Logging into MYOB AO.
Installing SQL Server 2014 Service Pack 2 manually
If you received an error that the SQL installation failed:
-
Locate and run \Software\SQL2014\SQL_2014_SP2_EXPRWT_x86_ENU.exe.
-
Select Upgrade from SQL Server 2005, SQL Server 2008, SQL Server 2008 R2 or SQL Server 2012:

Click to enlarge -
In Instance to upgrade, select MYOBACCT, then click Next:

Click to enlarge -
The install is complete, click Close to exit.
-
Run the MYOB AO install.
How do I know if the SQL Server Service Pack has successfully upgraded?
-
Open SQL Server Management Studio.
-
Locate the installation folders (for example, IR2012\MYOBDATA)
-
Click New Query in the top left hand corner
Type “Select @@Version” -
Click Execute.
You should see ‘SQL Server 2014 (SP2)’ in the Results tab at the bottom of the screen.

Workstation installation
An upgrade can either be done by Auto update when you open MYOB AO or you can run a Manual update.
There are changes to workstation installations as part of this release, refer to workstation install changes for further information.
If you see this screen, automatic workstation updates have been disabled for your practice, so you should run a Manual update on your workstation.

Auto update
If you see this screen when you open MYOB AO, automatic workstation updates are enabled at your practice:

Click Yes to update your workstation automatically.
Click No and you will need to run a Manual update (see below).
Document Manager installation
You’ll be prompted for the following information once the main installation of MYOB AO is complete:
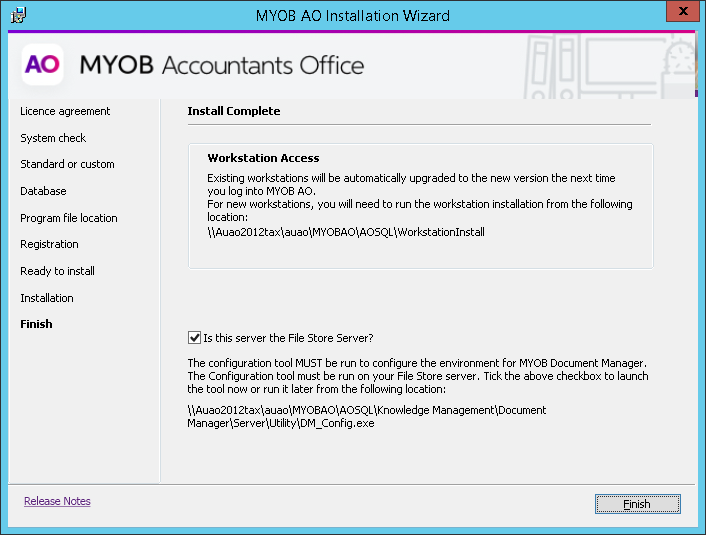
If the server you are installing on is your document file store server
-
Select the Is this server the File Store Server? checkbox, then click Finish
-
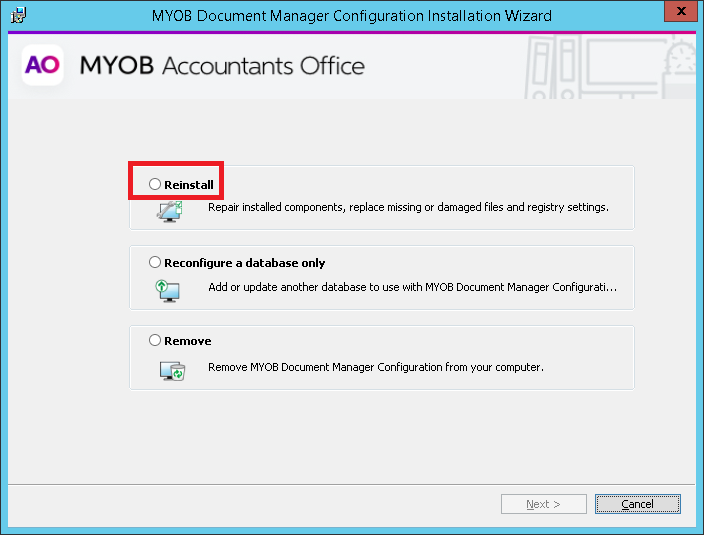
If you have already have Document Manager on your server, you will see this screen. Select Reinstall and click Next.
The repair is complete. -
If you don’t already have it, you will be prompted to install Adobe iFilter version 9.0 x64. Tick the checkbox and click Finish.
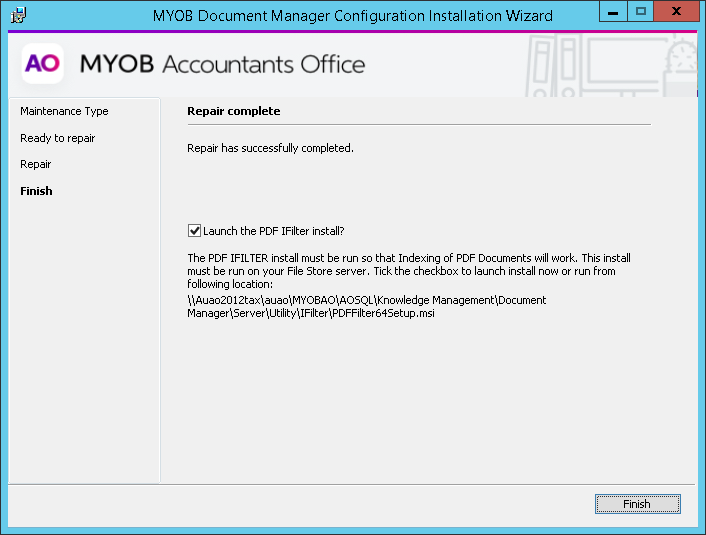
The PDF iFilter ensures that PDF documents will be indexed and therefore searchable in Document Manager.
If the server you are installing on is not your document file store server
Install the document file store on a different server:
-
Deselect the Is this server the File Store Server? checkbox, and click Finish to complete the installation.
-
Run the Configuration tool on your chosen server from C:\MYOB\Knowledge Management\Document Manager\Server\Utility\DM_Config.exe or C:\MYOBAE\AESQL\Knowledge Management\Document Manager\Server\Utility\DM_Config.exe.
-
Read and accept the Licence Agreement.
-
Select the SQL Server instance that contains your MYOB Accountants Enterprise database.
-
Enter the location and details of the port number for your Document Manager document file store and indexing service.
-
Follow the onscreen instructions to complete the installation.
-
If you don’t already have it, you will be prompted to install Adobe iFilter version 9.0 x64. Click Next through the installer screens until it completes.
The PDF iFilter ensures that PDF documents will be indexed and therefore searchable in Document Manager.
-
Run a workstation install on each workstation that uses Document Manager. The file is located at C:\MYOBAE\AESQL\WorkstationInstall\setup.exe.
You’ll only need to do this the very first time. On successive upgrades, the workstation update will occur automatically when you access MYOB AE. -
The Adobe PDF iFilter installer will open, click Next through the next few screens until the install is complete.
