
MYOB Ledger only
Transactions can be imported into Client Accounting using the Manage client file imports wizard. You can find this function on the Tasks bar of your client's Client Accounting > Trial Balance (or Workpapers) tab.
You can only import transactions via Client Accounting if your configured ledger is an MYOB Ledger. If you're using something different, you can still use the import functions in your configured ledger's software.
You can import up to 38,000 journal lines.
Preparing to Import
Creating and importing transactions in a .CSV file is the ideal option if the software you're exporting from doesn't produce an .MYE file format. For example, if you're exporting transactions from BankLink, Importing a Bank Statement into MYOB Ledger, or a third party software.
We're no experts in our competitors For instructions on how to export transactions from your client's third party software, refer to that product's help.
After exporting journals or transactions from your client's software, open the file using Microsoft Excel (or your preferred spreadsheet software) to check the format and amend according to the specifications.
We've created a template to help simplify the import process. Download the csv file and open the file in your preferred spreadsheet software (e.g. Microsoft Excel). This template doesn't contain any data, so you can add your own.
While you don't need to complete all the fields for a successful import, make sure you don't delete any unused columns, or rename any column headings.
File format requirements
Row 1 must contain ALL column headers.
You must have column headings present in row 1. These column headings are the name of the fields that the data is imported to.
If you don't have data to import for a particular field, the column heading must still be present in Row 1, but you can leave the data blank (i.e. row 2 onwards)
Row headers are not case sensitive.
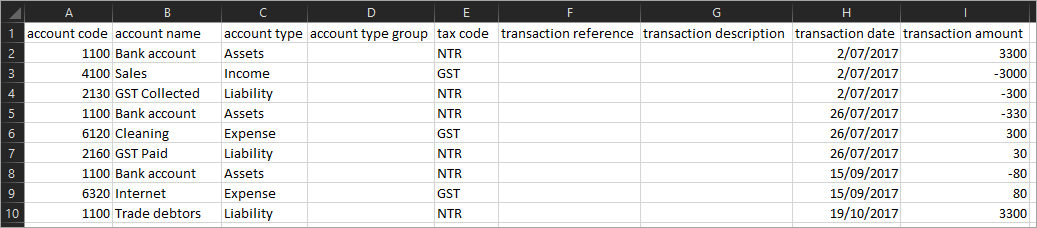
|
Column |
Column headings (field name) |
Mandatory or optional |
Rules for the data |
|---|---|---|---|
|
A |
Account code |
Mandatory |
Must be alphanumeric. Can contain ' / ' and ' - ' and ' . ' |
|
B |
Account name |
Optional |
|
|
C |
Account type |
Optional |
See Accepted Account types below |
|
D |
Account type group |
Optional |
|
|
E |
Tax code |
Optional |
See Accepted Tax codes below |
|
F |
Transaction reference |
Optional |
|
|
G |
Transaction description |
Optional |
|
|
H |
Transaction date |
Mandatory (if there are Transaction amounts) Optional (if there are no transaction amounts e.g. when importing a Chart of Accounts) |
Date format must be either:
|
|
I |
Transaction amount |
Optional |
|
Accepted Tax codes
|
Tax Code |
Description |
AU |
NZ |
|---|---|---|---|
|
CAP |
Capital acquisitions |

|
|
|
EXP |
Export sales |
|
|
|
FRE |
GST free |
|
|
|
GNR |
GST not registered |
|
|
|
INP |
Input taxed purchases |
|
|
|
ITS |
Input taxed Sales |
|
|
|
GST |
Goods & Services Tax |
|
|
|
NTR |
Not reportable |
|
|
|
NA |
Not applicable |
|
|
|
E |
Exempt |
|
|
|
Z |
Zero-rated |
|
|
|
I |
GST on imported supplies |
|
|
Importing your data
Stage 1: Choose a file to import
-
From AE/AO, open the client and go to the Client Accounting > Trial Balance (Workpapers) tab.
-
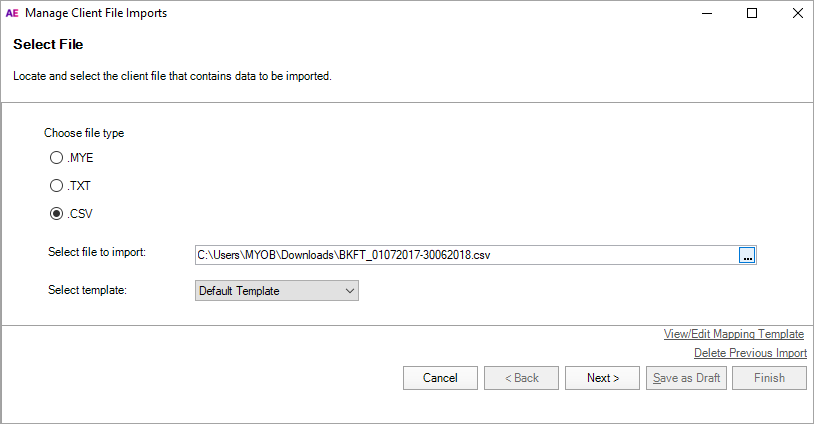
On the TASKS bar, click Manage client file imports. The Manage Client File Imports window appears.

-
Select .CSV .
-
At the Select file to import field, click the ellipses (

-
Highlight the file and click Open. The file path appears in the Select file to import field.
-
At the Select template field, click on the drop-down menu and choose Default Template. If you've created a custom import template, you can select this template here.
-
Click Next.
Stage 2: Choose how to map accounts
-
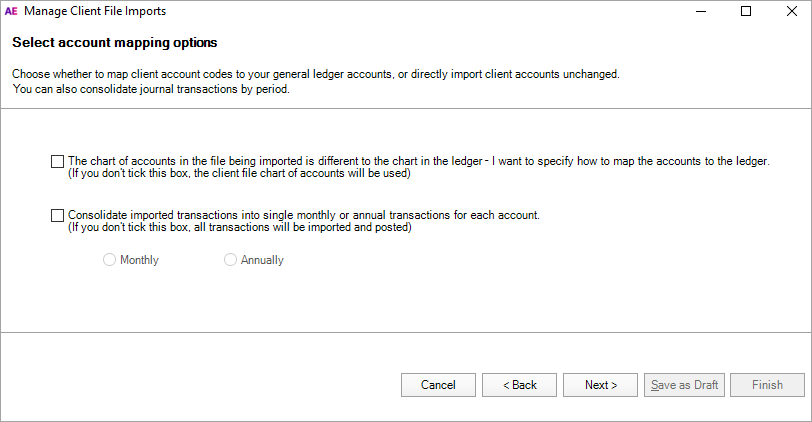
Choose whether you want to map your client's account codes to your ledger's accounts, or to import your client's accounts:
Option
Description
The chart of accounts in the file being imported is different to the chart in the ledger – I want to specify how to map the accounts to the ledger
If the chart of accounts in the export file is the same as your chart of accounts, you can choose whether to select this option.
When this option is not selected, all transactions import with the account code from the export file. Any accounts that don't exist in your chart are automatically added.
If your chart of accounts is different from the chart in the export file, select this option. This will let you map the exported accounts to your ledger accounts.
Consolidate imported transactions into single monthly or annual transactions for each account
Consolidates transactions into a single monthly or annual transaction for each account. To import all transactions, leave this checkbox unticked.
Only imported transactions can be viewed. If you choose to import consolidated transactions, you'll only be able to view one imported transaction per month or year (as selected).
You can import up to 38,000 transactions. If you have more than this, select this checkbox to consolidate your transactions or alternatively, separate the CSV file into multiple files.
If you've selected this checkbox, select to import either:
-
Monthly – imports one transaction per month for each account
-
Annually – imports one transaction per year for each account.
-
-
Click Next.
If you've selected the first option, continue to Map Accounts. Otherwise, continue to Stage 4.
Stage 3: Map the accounts
-
In the Map Accounts window, click in the Map to column for each account and choose an account to import your client's transactions to.
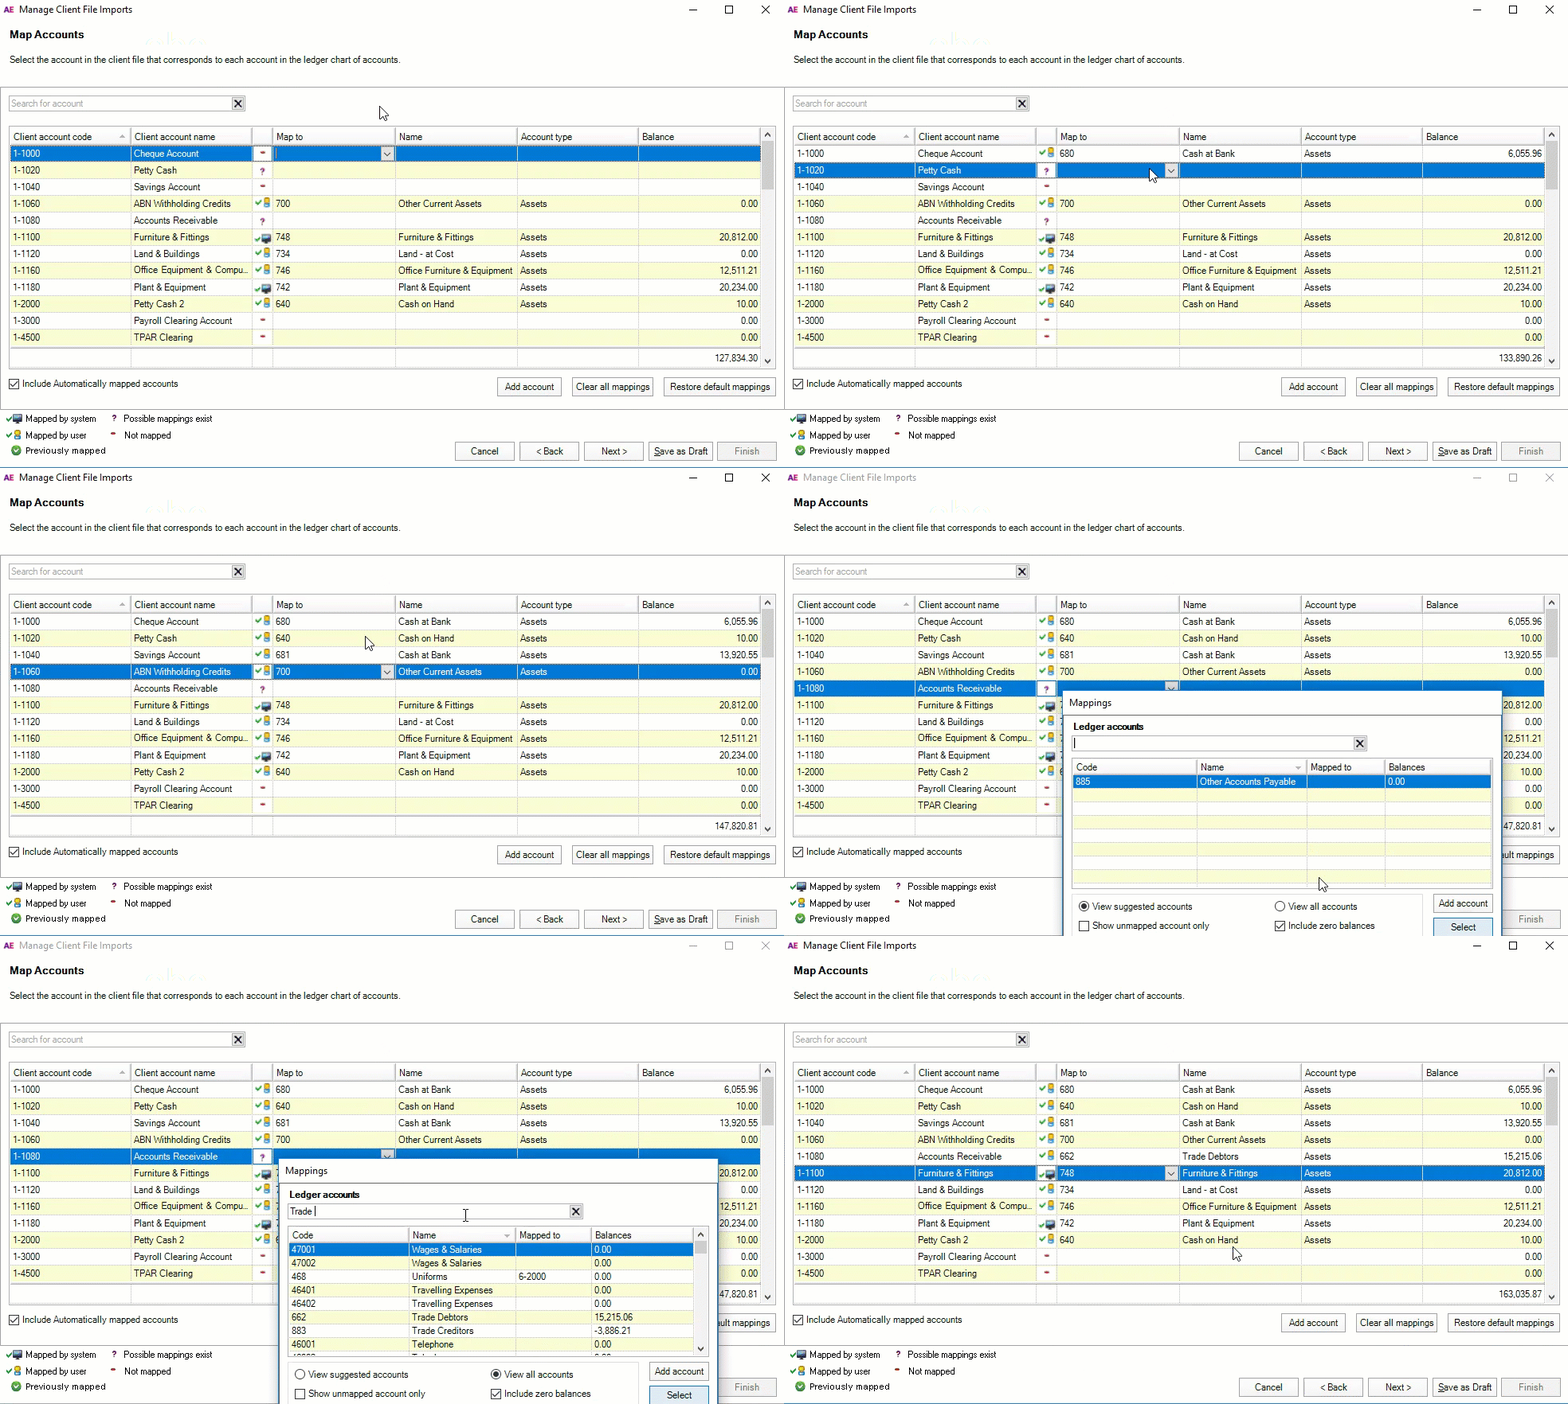
The Account name, Account type and Balance are updated automatically. Repeat this step for each account code.
Can't find the account you're looking for? You may need to create a new one. Click Add account and fill in the details.
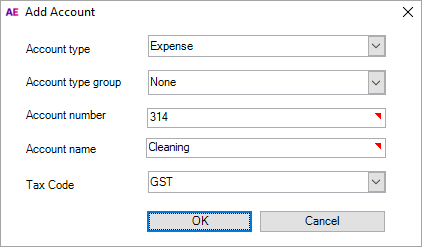
-
Once all accounts have been mapped, click Next.