Skip table of contents

Choosing the workpapers and financial statements for entity types

When you create a new client in Client Accounting, it will have access to the default special-purpose workpapers and financial statements.

To change the workpapers and financial statements to suit your client's entity (Company, Trust, Partnership, Sole trader), you need to edit the Entity information workpaper.

Edit the Entity information workpaper

  1. In the Client overview screen, click the Workpapers workflow and select the Entity information workpaper.  

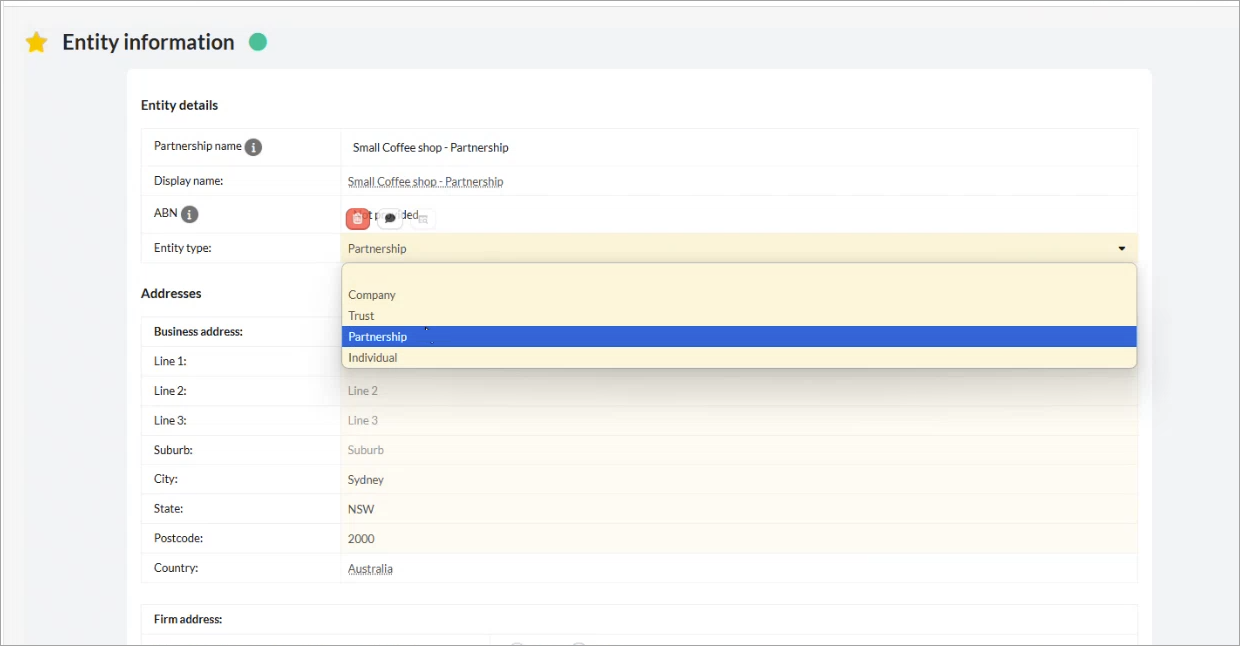
  2. Select Trust/Partnership/Company/Sole Trader as the Entity type and click Save.

    1. Enter the Trust type and Trustee type. These options are only available once you save Trust as the Entity type.

  3. Complete the details of the Entity information workpaper. 

  4. Once completed, this will adjust the workpapers and financial statements to be tailored to your client's entity type. 

Entity-info.png

Adding the Income allocation workpaper

When preparing workpapers or financial statements for a trust or partnership, you’ll see an Income allocation workpaper. This workpaper ensures that income is accurately distributed among beneficiaries or partners.

Watch the video to learn about using the Income allocation workpaper.

Map beneficiary accounts 

Before using the Income allocation workpaper, make sure your client’s beneficiary accounts are mapped correctly.

Go to the Account mapping page, where you’ll find 20 stakeholder accounts available to map to. These are labelled stakeholder accounts, so they are relevant across all entity types.  

Whether your client’s data has a single account for each beneficiary, or multiple accounts for things like opening balance, income distribution or loan accounts for each beneficiary, assign each beneficiary to a unique stakeholder account and map all related accounts there.  

One stakeholder account per beneficiary is key to ensuring the correct accounts populate the Income allocation workpaper.

Prepare the workpaper
  1. Open the Income allocation workpaper. Each stakeholder account that's been mapped to will have a row.

  2. Enter each beneficiary's legal name in the Stakeholder # field they’ve been assigned to.

  3. Click the hash symbol (#) to view all accounts mapped to that stakeholder account.

    Income distributions to beneficiearies details with Show used option selected.png
  4. Select the distribution account and click Save. Select only one account for each beneficiary to ensure that the journal populates correctly. Repeat for each beneficiary.  

  5. When you’re ready to distribute income, the workpaper offers three flexible methods. The default is to distribute a percentage of net profit or loss, which you’ll see set at the top of the workpaper. The three options are: 

    1. Fixed amount allocation: For this option, enter the fixed amount next to each beneficiary in the Fixed amount field.

      Income distributions to beneficiearies details with Fixed amount fields highlighted.png
    2. Percentage of net profit allocation: For this option, enter the percentage for each beneficiary in the Percentage of net profit field.

      Income distributions to beneficiearies details with Percentage of net profit fields highlighted.png
    3. A combination of fixed amount and percentage:  

      • For this option, select the Percentage of Remaining Net Profit option at the top of the workpaper. 

      • Enter the fixed amount in the Fixed amount field next to the relevant beneficiary.

      • Enter the percentage in the Percentage of remaining net profit field next to the relevant beneficiary.

        Income allocation workpaper with Percentage of remaining net profit option selected.png
  6. You’ll also see a column for the comparative year amounts. In the first year of preparation, enter the amounts if you want to show comparative amounts in the income statement. Comparative amounts will automatically flow through in subsequent years.

    Comparative year amount examples.png

    The workpaper automatically calculates the percentage amounts in the Amount column and the total distribution, including fixed amounts, in the Total Distribution column.  
    At the bottom of the workpaper, the Distribution summary table displays percentages and amounts to help with tax return preparation.  

Post the adjustment journal

You can post the adjustment journal for this distribution if it isn’t already posted.

Click Post adjustment, review the pre-populated accounts and amounts and click Add.


JavaScript errors detected

Please note, these errors can depend on your browser setup.

If this problem persists, please contact our support.