Accountants Enterprise in Australia only
When you create a new Chart Map folder, the level you are logged in to Report Designer will determine the hierarchy level of the new folder. For example, if you opened Report Designer at the Client level, the new folder will be a Client level folder.
You may find that you need to rename a Chart Map folder or move it to sit under another folder or at another level of the tree.
If you edit a Chart Map folder that has lower level child components, e.g., you rename a Practice level folder which contains Client level items, the child items will become ‘orphans’ and are lost. To avoid this, use the right–click menu in the Chart Map Explorer pane to copy the folder to be edited to the current level before the edits are applied at the higher level. In this way, the child components are retained in the lower level version of the folder. The copied folder will be saved at the Practice or Client level depending on the level at which you opened Report Designer.
If you modify a Chart Map item that is referenced by a Format, you will also need to modify the Format accordingly as there is no flow-through update to the Format when a Chart Map item is changed. For example, if you change the Chart Map folder ‘Sales’ to ‘Income’, any references within Formats to the Chart Map folder ‘Sales’ will not automatically be changed to ‘Income’, and will therefore fail.
You may also find that you need to delete a Chart Map folder that is no longer required. If you want to delete a folder that contains shortcuts, account ranges or other folders, then all those child items will be deleted along with the parent folder.
You cannot delete Master level folders.
The following tasks can be performed from within the Chart Map tab in Report Designer.
To create a new Chart Map folder
-
In the Chart Map tab, select the New Chart Map Item toolbar button

-
In the Item Type area of the Chart Map Editor window, select the Folder radio button.
-
In the Folder Name field, enter the name for the new folder.
Spaces and symbols (i.e \ / @ [ ] ( ) ! % ^ * - + = { } < > , “ ‘ ) are not allowed as part of the folder name. A maximum of 255 characters can be entered.
-
In the Parent Folder list box, select the path to the folder that the new folder will go in. For example, to add a folder under the BalanceSheet.Assets folder, select BalanceSheet.Assets in the list box.
To add a folder to the main branch of the Chart Map tree, select <None> from the list. If you select a parent folder for the new folder and enter a folder name that is the same as an existing folder at that level in the same parent folder, an error tag (

-
Click Apply. The new folder will be added to the path you selected.
To edit a Chart Map folder
-
In the Chart Map tab, select the folder that you want to edit and click the Edit Chart Map Item toolbar button

-
Make any required changes to the folder name by typing over the existing text in the Folder Name field.
Spaces and symbols (i.e \ / @ [ ] ( ) ! % ^ * - + = { } < > , “ ‘ ) are not allowed as part of the folder name. A maximum of 255 characters can be entered.
-
If you want to change the location of the selected folder, select the required path for the folder in the Parent Folder list box. For example, to move the folder under the BalanceSheet.Assets folder, select BalanceSheet.Assets in the list box.
To add a folder to the main branch of the Chart Map tree, select <None> from the list. If you select a parent folder for the new folder and enter a folder name that is the same as an existing folder at that level in the same parent folder, an error tag (
-
Click Apply to implement and save your changes.
To delete a Chart Map folder
-
In the Chart Map tab, select the folder that you want to delete. You may need to click the Expand (+) icon next to the relevant nodes to expand the portion of the Chart Map tree that contains the item you want to delete.
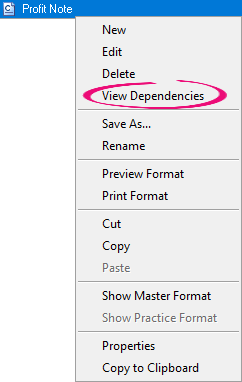
Before you delete the folder, you may want to view a list of all formats and reports using this Chart Map item. Right-click on the Chart Map folder or item and click View Dependencies. You can then decide if any action needs to be taken such as Save As or Copy to retain any child components before you confirm the delete.
-
Click the Delete Chart Map Item toolbar button

-
Click Yes to continue with the deletion. The folder is removed from the Chart Map tab.